Manufacturers worldwide have recognized Standard E-110, defined by the American Society for Testing and Materials (ASTM) as the accepted parameters for hardness testing using the Rockwell method. For companies looking for a portable hardness tester standard E-110 to portable Rockwell hardness testers. The general testing procedure of E-110 is as follows:
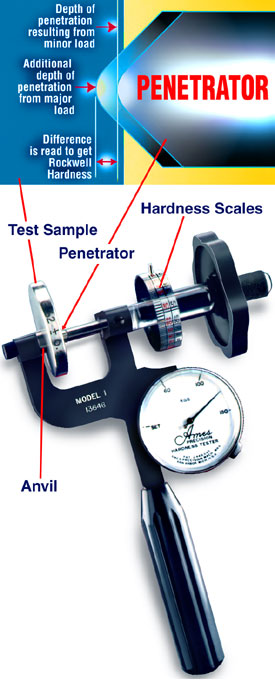
A rounded penetrator of known hardness is forced into the test surface under a specific pressure load. A crude hardness reading could be taken from the depth of penetration. Some inexpensive testers use this method.
To eliminate errors caused by surface variations, a minor load is applied and held while the tester is “zeroed”. The real hardness reading measures the difference in penetration between the minor load and the major load.
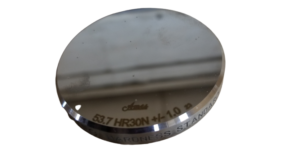
Tester accuracy is checked by running the test on specimens of certified hardness.
Soft materials are usually tested in the Rockwell B Scale, using 1/16″ ball penetrator and 100 Kg Major Load. Hardened steel and hard alloys are tested in the Rockwell C Scale, using a diamond penetrator and a 150 Kg Major Load. Do not use the ball penetrator with the steel test block or when testing hard steel. Such a procedure will damage the penetrator and result in invalid tests
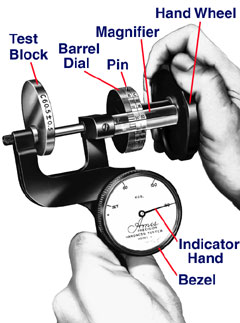
Secure the penetrator and the appropriate anvil in the tester. Check the position of the indicator hand. It should rest directly on the dot on the indicator dial. If it doesn’t, adjust the dial by turning the bezel to locate the dot under the pointer.
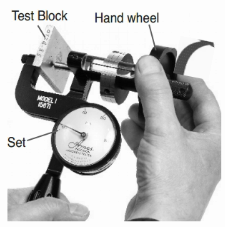
Slowly turn the hand wheel to bring the indicator hand to the line marked “SET”. This applies minor pressure load to the penetrator.
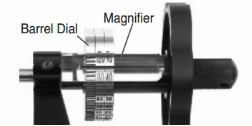
4. Set the barrel dial
5. Apply Major Load
Turn the hand wheel only until the dial pointer rests on the major pressure load indicated by the chart.
Be careful to bring the indicator hand exactly to the desired graduation on the dial and no farther. (Once penetration goes beyond the major load, a valid reading can no longer be obtained from that penetration. Go back to Step 2. If reading can no longer be obtained from that penetration. Go back to Step 2. If you did not stop at the major load, go on to Step 6.)
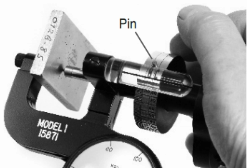
Rotate the top of the barrel dial toward you until its pin rests against the upper edge of the Lucite magnifier. The upper line of the barrel’s hardness scales should be exactly aligned beneath the hairline on the magnifier. (NOTE: There is no pin on Model 1-4). These must be aligned visually.)
Turn the hand wheel
Step 6: Take the reading
Standard Tester:
With the diamond penetrator, read Column C on the barrel dial (black numbers).
With the ball penetrator, read column B (red numbers).
Superficial Tester:
With either the diamond or ball penetrator, take your reading from the black-numbered N-T column on the barrel dial. (The difference n reading is created by the difference in penetrators: N with diamond, T with 1/16″ ball.)