Request Calibration
Request Repair
You can download these Accuracy Testing instructions for your Ames Tester:
What is Ames Accuracy Testing?
Accuracy testing is basically a self-check to demonstrate that your hardness tester is reading correctly.
Why do I need Accuracy Testing?
The Accuracy test can help you determine if your Ames tester is not reading accurately.
What if I only use my tester occasionally?
Regardless of how often you are using your Ames tester, you need to perform accuracy testing.
How often should I perform an accuracy test?
It is recommended to perform accuracy testing every time you use the tester for a new test or when you move the tester to a new location.
How many times can I use a test block for accuracy testing?
You can continue to use the test blocks on unmarked portions as long as you can read the test result.
Where can I get new test blocks?
You can order new test blocks from online.
https://youtu.be/2GYJDSFyPLQ
6 Steps to Perform Accuracy Testing on Your Ames Tester:
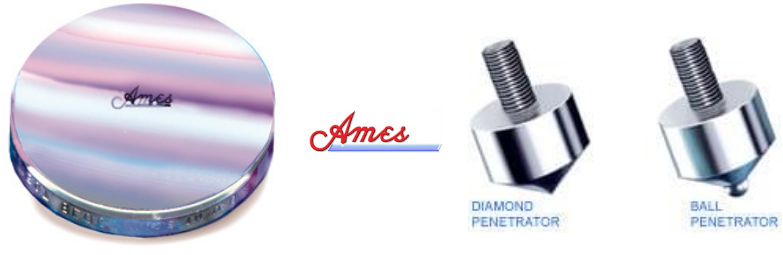
1. Select the penetrator and test block
Soft materials are usually tested in the Rockwell B Scale, using 1/16″ ball penetrator and 100 Kg Major Load. Hardened steel and hard alloys are tested in the Rockwell C Scale, using a diamond penetrator and a 150 Kg Major Load.
Do not use the ball penetrator with the steel test block or when testing hard steel. Such a procedure will damage the penetrator and result in invalid tests.
2. Set up the tester
Secure the penetrator and the appropriate anvil in the tester. Check the position of the indicator hand. It should rest directly on the dot on the indicator dial. If it doesn’t, adjust the dial by turning the bezel to locate the dot under the pointer.
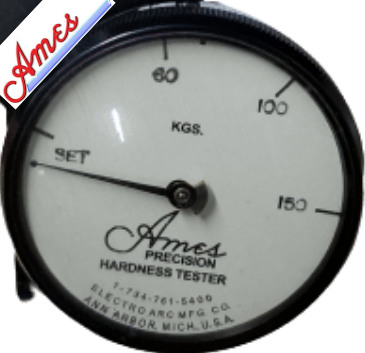
3. Apply Minor Load
Slowly turn the hand wheel to bring the indicator hand to the line marked “SET”. This applies minor pressure load to the penetrator

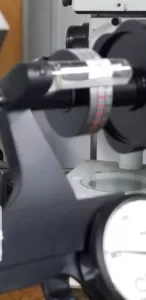
4. Set the Barrel Dial
Rotate the top of the barrel dial toward you until its pin rests against the upper edge of the Lucite magnifier. The upper line of the barrel’s hardness scales should be exactly aligned beneath the hairline on the magnifier. (NOTE: There is no pin on Model 1-4). These must be aligned visually.
5. Apply Major Load
Turn the hand wheel only until the dial pointer rests on the major pressure load indicated by the chart.
Be careful to bring the indicator hand exactly to the desired graduation on the dial and no farther. (Once penetration goes beyond the major load, a valid reading can no longer be obtained from that penetration. Go back to Step 2. If reading can no longer be obtained from that penetration. Go back to Step 2. If you did not stop at the major load, go on to Step 6.)
6. Take the reading
Turn the hand wheel back to bring the indicator hand back to “SET” and take the reading on the barrel dial through the Lucite magnifier. Each graduation on the barrel dial indicates two points in the Rockwell scale.
Standard Tester:
- With the diamond penetrator, read Column C on the barrel dial (black numbers).
- With the ball penetrator, read column B (red numbers).
Superficial Tester:
- With either the diamond or ball penetrator, take your reading from the black-numbered N-T column on the barrel dial. (The difference n reading is created by the difference in penetrators: N with diamond, T with 1/16″ ball.)
NOTE: The first two or three tests may be low until the penetrator and anvil have become firmly seated.