Proudly Made in Michigan

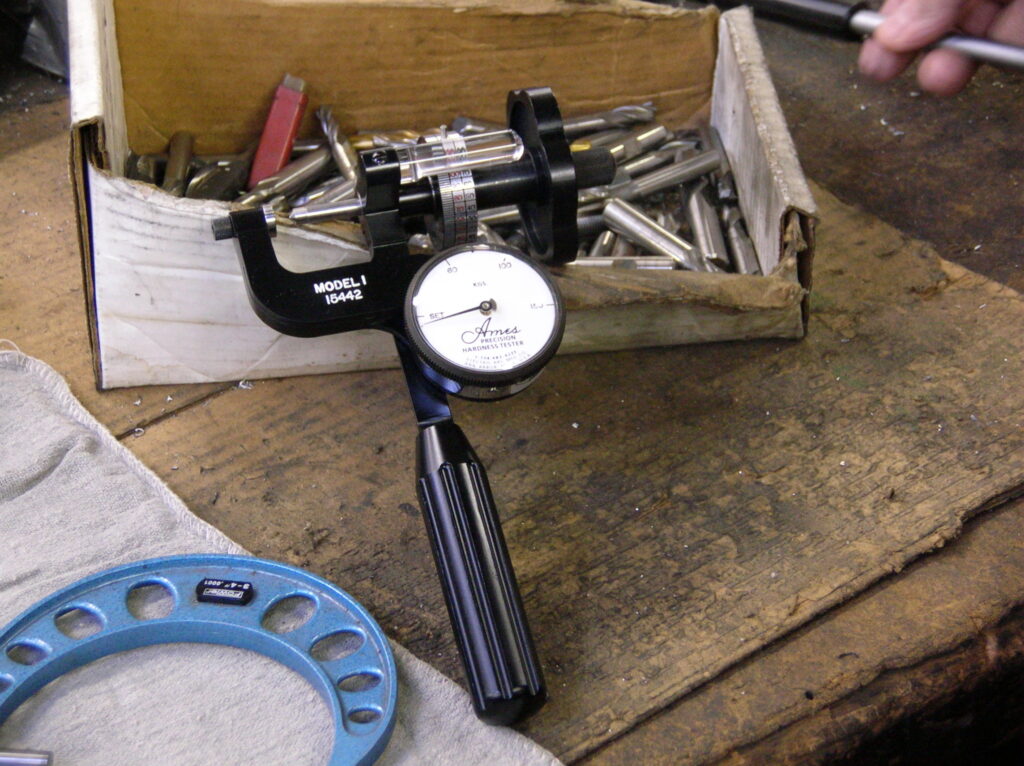
Ames Hardness Testers offer a range of portable metal hardness testers for quick and easy on-site hardness testing in the Rockwell scales. Our testers fit most testing situations and comply with ASTM E-110 standard. Our Rockwell testers are built with the highest quality standards of craftsmanship.

Shop
Head Office
Stillion Industries 2055 North Lima Center Road, Dexter, Michigan 48130
Call Or Email Us
(734) 475 - 8527 Sales@electroarc.com
7:00 AM - 3:00 PM
Monday to Friday

Ames Portable Hardness Testers

Low Cost, Lightweight, Reliable Use Anywhere! Superior Service+Support

Read More

Equipment – Get an accurate reading every time.

Test Blocks, Bench Stand, Anvils, Penetrators

Read More

Calibration and Repair

Maintaining your Ames Portable hardness Tester requires annual calibration. We can also repair broken testers

Read More

Check out our other websites for other needs you may have:

Learn everything you need to know about Ames testers.

Ames Hardness Tester Blog

Using Ames Testers in Hobby applications

Why Hobbyists Prefer Ames Testers

The Ames Portable Hardness Tester is a device used to measure the hardness of metals and alloys. While it is primarily used in industrial settings for quality control and material testing, there are also hobby applications for this tool. As we discussed in a previous blog, Ames portable testers are popular among knife makers.  Even the old testers are used because they are looking for a ballpark hardness in their trade.

Forging Martial Arts and Hunting Bladed Tools

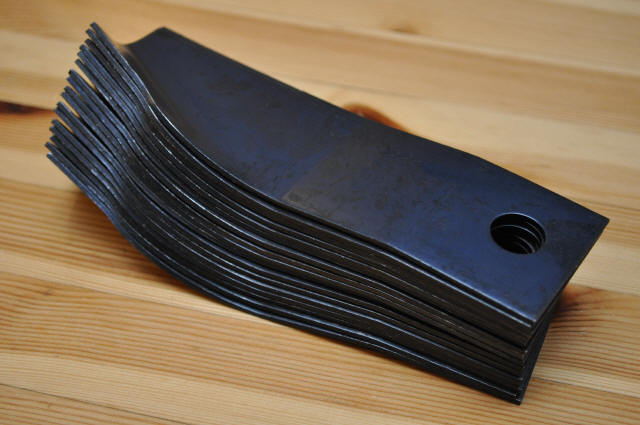
hardness tester for lawnmower picture

The smithing forums tend to get mentions of Ames portable hardness testers as a reliable tool for the trade.  In the Blade Smiths Forum, ‘JenniferP’ ported about her Ames tester, stating it provides more accurate results than the Accu-test HRc tester.  Many members commented that they had old testers, but they are no longer eligible for calibration. Just a reminder, we may be able to repair and calibrate your old tester but without certification.  The reason for this is the fatigue on the frame makes the instrument unreliable.  It may leave our factory calibrated, but arrive to you not testing accurately.  While exact results are not always the goal of a Hobby Knifemaker, precision is a promise our company stands by.  Accuracy may be a critical point, especially for small thin pieces.  As mentioned on BladeMag, the correct hardness will guarantee superior strength in a blade.  The hardness test gives you an idea of the flex strength and confirms that the knife’s edge will hold.  Although many testers have been used by knife makers, testing with a Rockwell hardness tester provides the most reliable results.

In another forum for Hobby machinists, a member finds an old hardness tester and asks “How can this tool benefit my Hobby” to which other members answer, that this instrument is helpful for anyone heat-treating steel, and another member offers to take it off his hands.  Hobby applications in testing clutches for racing led to the development of a specific testing application which was developed outside of normal Ames tester capacity.  The Ames tester has value for any hobby application requiring a hardness test.
Some Examples of Hobbies that Ames Tester are Useful with:

  1. Metalworking: For hobbyists who enjoy working with metal, the Ames Portable Hardness Tester can be a useful tool for testing the hardness of different metals and alloys. This information can help guide decisions about which materials to use for specific projects, as well as provide a baseline for comparing the hardness of different materials.

  2. Jewelry making: In the world of jewelry making, the hardness of metals is an important factor in determining their durability and resistance to wear and tear. The Ames Portable Hardness Tester can be used to measure the hardness of different metals used in jewelry making, such as gold, silver, and platinum.

  3. Gunsmithing: For hobbyists who enjoy gunsmithing or working with firearms, the Ames Portable Hardness Tester can be a valuable tool for testing the hardness of gun parts and components. This information can help ensure that the parts are made from high-quality materials and are durable enough to withstand the rigors of use.

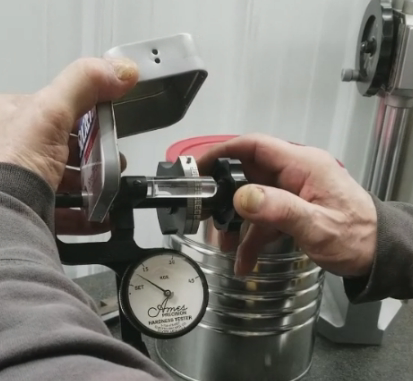
Testing Tin Plate with an Ames Portable Superficial Tester

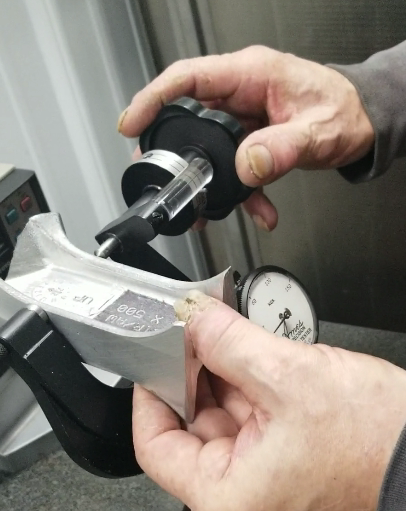
The object of hardness testing tin plate is to determine the Temper (hardness) designation of the material. This is a classification system where the temper designation indicates the appropriate use for your tin plate. Tin plate has different and specific characteristics at each designation. The higher the temper designation, the harder the material.

You can test tin plate in either the Rockwell 15-T scale (R15T) or in the Rockwell 30-T scale (R30T) and you will always use a diamond spot anvil. The diamond spot anvil is used to avoid the “anvil effect” which is when the result of the test is affected by the steel anvil because the thinness of the material being tested did not support the major load pressure. In other words, the hardness of the anvil was tested rather than the material. The Diamond Spot Anvil is too hard to yield to the major load and, therefore, will not influence the test results. The selection of scale is determined by the thickness (or weight) of the material to be tested. The thickness of the tin plate is designated as a weight. Tests in R15T are made on plate which is less than 75 lbs. per base box. Tests in the R30T are made on plate which is over 75 lbs. per base box.

Since the standard used by the U.S. Tin Can Industry is the R30T scale, all R15T test results must be converted to R30T. For conversion and determination of Temper Designations with related characteristics, we offer the following chart:

Temper Tin Plate
Designation R30T R15T Characteristic

   T-1        52 maximum      78.5 maximum        soft for drawing

   T-2        50 to 56        77 to 80        moderate drawing
                                Where some stiffness 
                                is required

   T-3        54 to 60        79 to 81.5      shallow drawing

   T-4        58 to 64        81 to 85        general purpose
                                Where increased 
                                stiffness is required

   T-5        62 to 68        82.5 to 85.5        stiff, rephosphorized 
                                Steel used for 
                                Hardness to resist 
                                Buckling

   T-6        67 to 73        85 to 88        rephosphorized steel
                                for great stiffness

Tinplate is a popular material used in the packaging industry due to its excellent corrosion resistance and durability. However, the mechanical properties of tinplate can vary depending on the manufacturing process and the thickness of the coating. Therefore, it is essential to conduct hardness testing to ensure that the material meets the required specifications.  Hardness testing is a non-destructive method that measures the resistance of a material to deformation. The Ames Portable Hardness Tester is a useful tool for testing the hardness of tinplate.

What is an Ames Portable Hardness Tester? The Ames Portable Hardness Tester is a handheld device that uses the Rockwell hardness testing method to measure the hardness of a material. The tester consists of a spring-loaded diamond-tipped indenter that is pressed into the surface of the material under a specified load. The depth of the penetration is measured, and a hardness value is calculated based on the amount of penetration. The Ames Portable Hardness Tester is easy to use and can provide accurate and repeatable results.

How to Test Tinplate with an Ames Portable Hardness Tester: Before conducting a hardness test on tinplate with an Ames Portable Hardness Tester, it is essential to ensure that the surface of the material is clean and free of any contaminants. The test should be conducted on a flat surface of the tinplate that is at least ten times thicker than the depth of the indentation. The test should be conducted using the C-scale, which is the most common scale used for testing tinplate.

To conduct the test, the Ames Portable Hardness Tester is placed on the surface of the tinplate, and the load is applied by turning the knob on the device. The load should be applied slowly and evenly to ensure accurate results. After the load has been applied, the indenter is removed, and the depth of the penetration is measured. The hardness value is then calculated using the following formula:

Hardness = 100 – (Depth of penetration x 2)

The hardness value can then be compared to the required specifications to determine if the material meets the necessary hardness requirements The Ames Portable Hardness Tester is easy to use and can provide accurate and repeatable results. By conducting hardness testing with an Ames Portable Hardness Tester, manufacturers can ensure that their tinplate meets the necessary hardness requirements and is suitable for use in a wide range of applications.

What is the Formula for Rockwell Hardness?

The Rockwell Metal Hardness Scales Explained

The formula for Rockwell hardness is as follows:

HR = N – (d / D)

HR = Rockwell hardness value N = total load applied to the indenter d = depth of penetration of the indenter D = diameter of the indenter

Where HR is the Rockwell hardness value, N is the load applied (in kgf), d is the depth of the indentation (in mm), and D is the diameter of the ball or the width of the diamond cone (in mm). The Rockwell hardness test uses different scales based on the load applied and the type of indenter used. The most common scales are the A, B, C, D, E, F, G, and H scales, each with a different combination of load and indenter. The Rockwell hardness test is widely used to measure the hardness of materials, including metals, plastics, and ceramics.

To apply the formula for Rockwell hardness, you will need to have the following information:

  • The load applied (in kgf)
  • The depth of the indentation (in mm)
  • The diameter of the ball or the width of the diamond cone (in mm)

Once you have this information, you can use the following steps to calculate the Rockwell hardness value:

  1. Determine the Rockwell scale: The Rockwell scale is determined by the load applied and the type of indenter used. For example, the Rockwell C scale uses a 150 kgf load and a diamond cone indenter.
  2. Measure the depth of the indentation: Use a microscope or other measuring device to measure the depth of the indentation made by the indenter.
  3. Calculate the Rockwell hardness value: Use the following formula to calculate the Rockwell hardness value:HR = N – (d / D)where HR is the Rockwell hardness value, N is the load applied (in kgf), d is the depth of the indentation (in mm), and D is the diameter of the ball or the width of the diamond cone (in mm).
  4. Interpret the results: The Rockwell hardness value can be compared to a standard chart to determine the hardness of the material being tested.

It is important to note that the Rockwell hardness test should be performed by a qualified technician using properly calibrated equipment. The test results may be affected by factors such as the surface finish of the material and the accuracy of the measuring equipment.

Calibrating your tester is not optional if you want optimum performance from your portable Rockwell tester. This needs to be conducted once per year to guarantee accurate readings when testing metals. Please check out our calibration page for more information on what our repair service includes and instructions on getting a tester re-calibrated with us.