Carrin Harris

Why Hardness Matters When Choosing Drill Bits

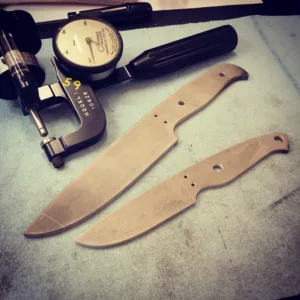
Knifemakers and Saw manufacturers are among the long-term customers of Ames Portable Hardness Testers. This makes sense because the hardness of your cutting instrument is an essential part of marketing your product. Drill bits are no different. The hardness of your drill bit tells a lot about the length of time you can count on the cutting power of your drill. One local manufacturer of drill bits compares the hardness of cobalt and carbide drill bits. This comparison references Rockwell hardness, showing that the hardness test provided the necessary information for customers like you considering purchasing drill bits.

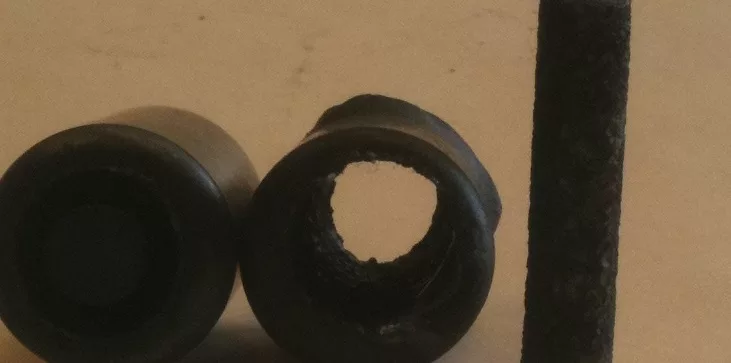
Carbide Drill bit, disintegrated carbide drill bit

What is the Hardness of your drill Bit?

According to the Tech talk carbide drill bits are of 75 HRC while cobalt drill bits are only 65 HRC. This makes the difference when using the drill bit because they last longer, are more heat resistant, and can improve your cycle times. On the flip side, carbide drill bits are more expensive, are harder to resharpen, and may need to be replaced when it is blunt.

Removing broken drill bits is no fun. Electro Arc metal disintegrator owners have experience with removing both cobalt and carbide drill bits. You may have experienced delays in manufacturing and machine downtime, due to a broken drill bit stuck in an essential part. Knowing your drill hardness can help you avoid this situation.

What is the Role of Hardness in Removing broken Drill Bits?

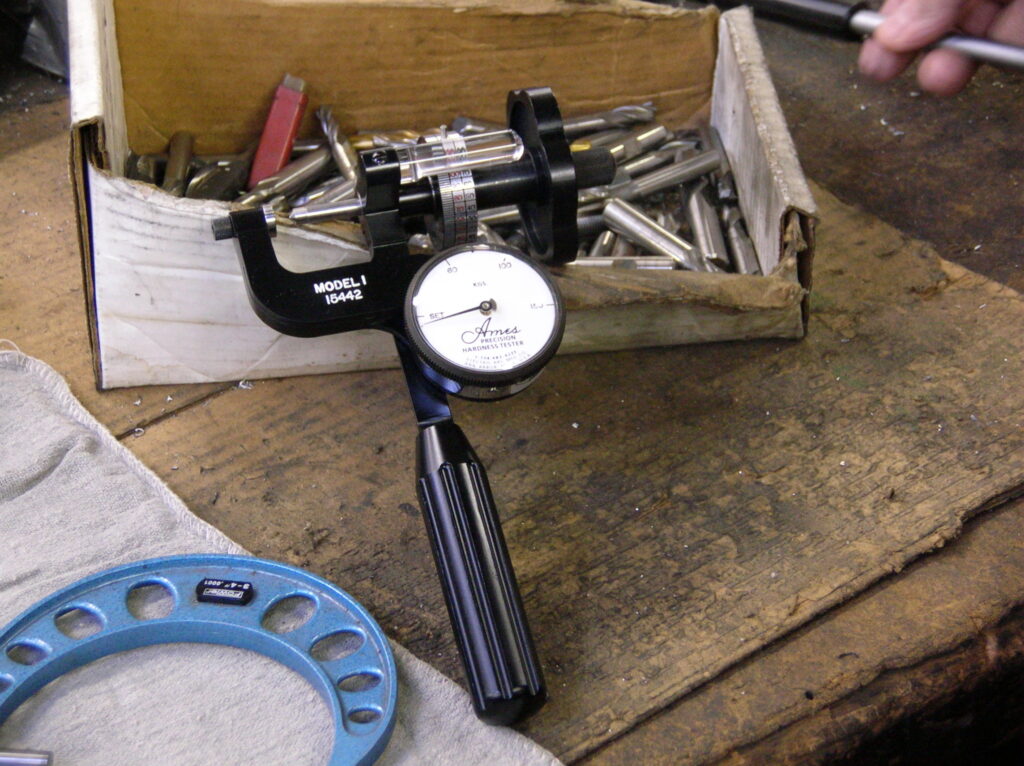
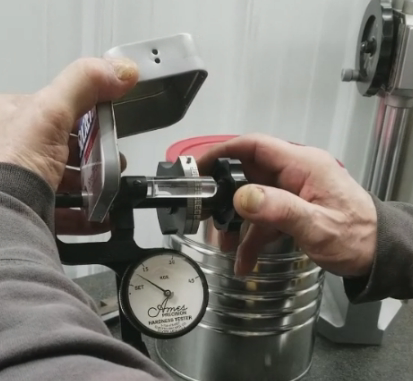
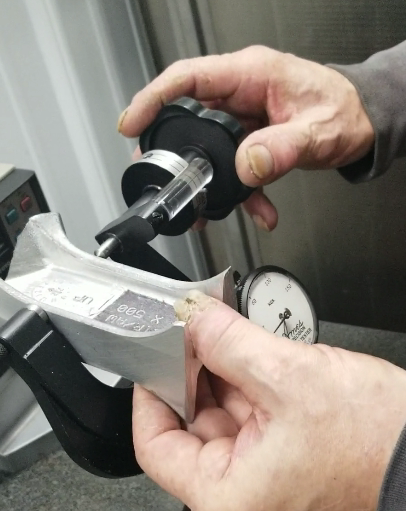
You can use Ames portable hardness testers to test hardness in just minutes. These testers are convenient because they can be used in tight spaces, like on the production floor to ensure your parts are the correct hardness. You can also plan to remove broken drill bits when you need to by having the correct machine on hand to do so. Cobalt and carbide drill bits, knives, and saw blades all have different hardnesses, so they will be different to remove. Our AC machines can remove your high-speed steel but you will need a DC machine to remove broken carbide drill bits.

As you know, there are lots of ways to check material for hardness, the most recognized is Rockwell. A wide assortment of portable testers are available on the market. Most of them can be converted to some sort of varying Rockwell reading. Electro Arc Ames portable hardness tester has been recognized across industries as a reliable, easy-to-use, accurate tester.

Some portable testers require manpower to hold the tester perfectly aligned and with enough force to get a consistent reading. Most of these testers use a spring-loaded penetrator shaft. This is fine but, if conditions are not correct, (misalignment, clamping pressure, surface finish, or material density), the test will be inaccurate and repeatability will be nonexistent. Ames Portable Hardness Testers, require no electricity and have a zero carbon footprint. The sling shot configuration securely traps the specimen between the penetrator and anvil allowing positive contact for the minor and major loads to be applied.

Hardness Testing for Knife Makers

Whether you are a hobby saw or knife maker, you may be wondering if you can use an old Rockwell hardness tester to test the hardness of your blades.  Many forums are full of comments from people just like you who have found old hardness testers at garage sales and want to know how to use them to verify their blad hardness.  There is a learning curve to using an Ames hardness tester, just like with any new measuring device. Yo can download the user manual for Ames testers for free and you will find all of the conversion charts you need to accurate reading no matter what you are testing.

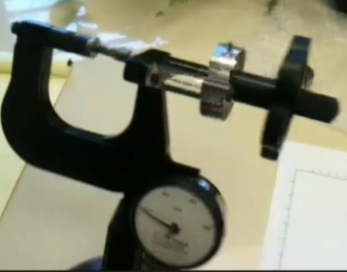
Check out this in depth Demo of an Ames Hardness Tester from an Advanced Knife Maker:

As a knife maker, you may have used a hardness tester to perform hardness tests on your knives or saw blades.  Ames portable hardness testers are a preferred model for blade makers to perform quick hardness tests.  Many knife makers may not have the budget to purchase a new Ames Portable Hardness Tester.  Used testers available on eBay and Facebook marketplace can be appealing because of their discounted price.  It is important to check the serial number of a used hardness tester before you purchase it.  Old hardness testers may serve the purpose you are looking for: A basic hardness test.  However, it is important to know that you may not be able to have the tester certified when it is repaired if it is too old.

The frames of old hardness testers can fatigue, which will not allow the tester to perform an accurate hardness test, even with calibration you may find that the hardness readings don’t stay accurate.  This is why we recommend you look for hardness testers that have a serial number of 12000 or newer.  You should always turn the tester over and check the sticker on the back.  Every Ames factory-calibrated tester has a sticker telling you when the next calibration should be performed.  Another way to determine if your used tester is a good buy is to perform accuracy testing.  You can use the test blocks provided with the tester to make sure the readings are accurate.  Make sure you are using the correct penetrator for the scale you are reading in.

Grismo Knives demonstrates Testing Blade Hardness with Ames Testers:

Are Durometers the same as Hardness Testers?

Durometers are designed to be used with plastics while hardness testers can be used to test the hardness of most materials

Hardness testers may also be referred to as durometers. The main difference between these two instruments is the materials being tested. Durometers, generally test soft materials, while hardness testers are designed specifically to test the surface hardness of materials ranging from plastics to metals like steel. Some testers have been modeled and branded for their hardness testing scales. Hardness testers may be large and stay in a fixed location – bench testers, other testers are designed for portable use such as the Ames portable hardness tester. In 1812 Friedrich Mohs developed a scale to identify the hardness of minerals, ranking them on a scale of 1-10. The Mohs hardness scale has identified minerals’ hardness and known objects that minerals can be tested against to determine the hardness. This is the oldest known hardness measurement system.

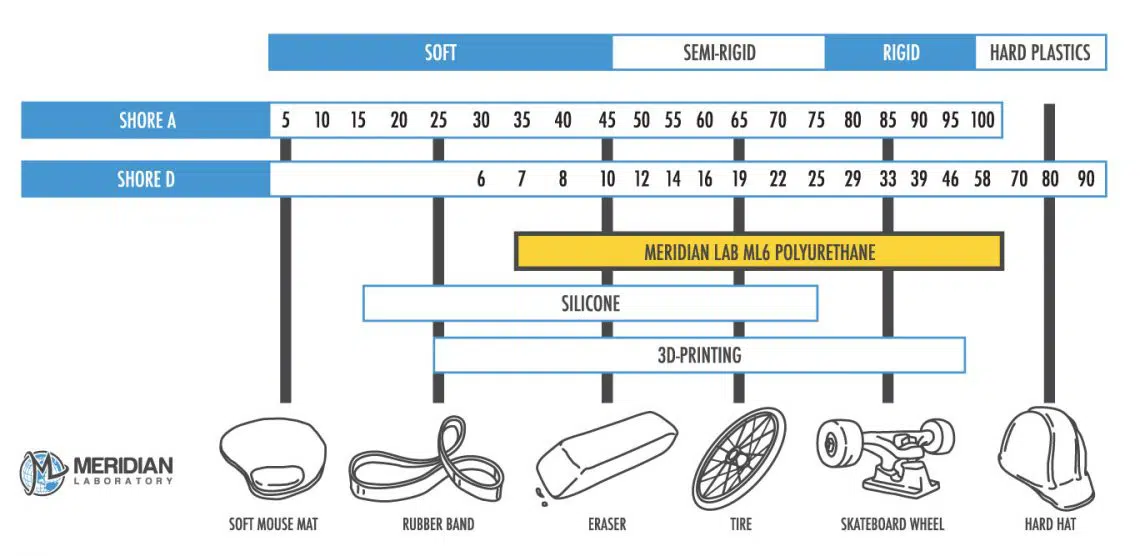
The Shore Scales are used in testing the hardness of plastics – Consisting of Shore 00 for super soft materials like gum through Shore D for hard plastics and rubbers. The scale was designed by Albert Ferdinand Shore in 1920 although his tester was not the first device to be called a durometer. The Shore durometer was designed specifically to test polymers, elastomers, and rubbers. The shore scales provide a universal reference for a large scale of non-metal hardness testing.

The Scleroscope hardness tester was developed in the same time period as Brinell by Albert Shore of Shore Instrument Manufacturing Company, this instrument did not use traditional penetrators, but a scale to measure the material’s elasticity, this instrument was replaced by more accurate and efficient forms of testing as technology advanced.

Vickers durometer This use of the durometer refers to the hardness test, not the instrument. This scale is popular in the UK and Europe and is one of the widest scales for hardness testing. The Vickers hardness test also referred to as the microhardness test procedure was developed in 1921 by Robert L. Smith and George E. Sandland at Vickers Ltd as an alternative to the Brinell method to measure the hardness of materials from ceramics to metals.  HBW (H from hardness, B from Brinell, and W from the material of the indenter, tungsten (wolfram) carbide). In former standards HB or HBS were used to refer to measurements made with steel indenters. The Vickers test uses a smaller indenter making it easier to use on materials like foil and other very thin materials. Also, the required calculations are independent of the size of the indenter, making calculations easier. The basic principle, observes a material’s ability to resist plastic deformation from standard sources. The Vickers test can be used for all metals and has one of the widest scales among hardness tests. The unit of hardness given by the test is known as the Vickers Pyramid Number (HV) or Diamond Pyramid Hardness (DPH). The hardness number is determined using the load over the surface area of the indentation, not the area normal to the force, so it is not actually pressure. The hardness number can be converted into units of pascals, but should not be confused with pressure, which uses the same units.

The UCI (Ultrasonic Contact Impedance or Portable Vickers Procedure) hardness test is newer, developed in 1968 by Claus Kleesattel. This portable testing method uses the Vickers hardness test method described above which requires the use of a diamond indenter according to ASTM standards.

This method uses a 136-degree diamond at the end of a vibrating rod. The rod is depressed into a fixed surface and a fixed load is applied, the ultrasonic vibration frequency is then measured and calculated into a hardness value. This hardness testing procedure is used for measuring the hardness of small items, objects with a wall as thin as 1 mm, can be used to test hardness on complex forms, and measures the hardness of surface hardened layers. The indentation is considered less destructive than other testers making this a popular option.

The Knoop method is an alternative to the Vickers technique. Developed by Fredrick Knoop at the National Bureau of standards (now known as NIST) in 1939. Primarily used for thin materials with the risk of cracking like ceramic and in cases where a thin layer like a coating needs to be tested. This microhardness testing method uses a narrow diamond-shaped indenter. Knoop is the preferred method for small long test specimens whereas the Vickers method is more effective on small round pieces. The Knoop method is time-consuming and requires preparation of the test piece. Readings can be impacted by load, temperature, and environment as well.

The Brinell hardness test is the oldest hardness test, developed by Sweetish engineer, Johan Brinell. this hardness testing method can be used on rough materials and is performed in a standard or non-standard method. Irregular surfaces do not impact the outcome of this hardness test and can be used to test the hardness of components made from powder and cast. This scale can be used to test both soft and hard materials hardness such as tin, steel, and iron. Some restrictions of this method include, it can not be used on smaller objects, it creates a deep impression and the test can only be performed on a flat surface. This method is also time-consuming and has a higher rate of error in conducting measurements. A variety of hardness testers are available on the market providing Brinell hardness tests.

A popular standard in the hardness testing industry is the Rockwell scale. Developed by Stanley Rockwell in the early 1900s, the scale uses the indentation of a smaller steel ball than the Brinell method (less than 4mm) or a diamond cone to create and measure penetration and determine hardness. This test can be performed quickly. No preparation is required on the material, the scale is easy to read and requires no extra equipment which makes it the most commonly used hardness testing method. You can test the hardness of soft and hard metals in the Rockwell scales, the portable testers allow onsite testing quickly and easily. The Rockwell hardness test is standard on a variety of testers, bench top models were developed by Stanley Rockwell and developed by the Wilson-Mauelen company, acquired by Instron corporation in 1993. The Ames portable hardness tester was developed in 1947 and sold by Ames Precision in Massachusetts until Electro Arc purchased the product line in 1975. These Rockwell hardness testers provide portable hardness readings in the Rockwell scale, and a conversion chart into the Brinell scale.

Why you Need a Superficial Hardness Tester

Why choose a Superficial Hardness tester?

Superficial testers are designed to test very soft and very thin materials and are designed to leave minimal surface distortion.  The three reasons to choose an Ames Superficial hardness tester are, you are testing a very thin or soft material, standard superficial testers will destroy these materials or the test will show the hardness of the penetrator.  This test will leave a less noticeable mark on the material you are testing.  The superficial tester uses 15, 30, and 45 kg weight to measure rather than 60, 100, or 160 kg as with a standard hardness tester. 

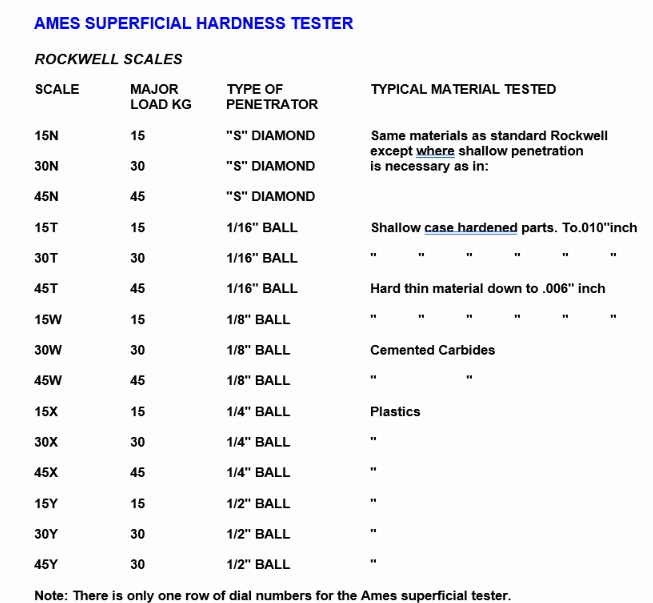
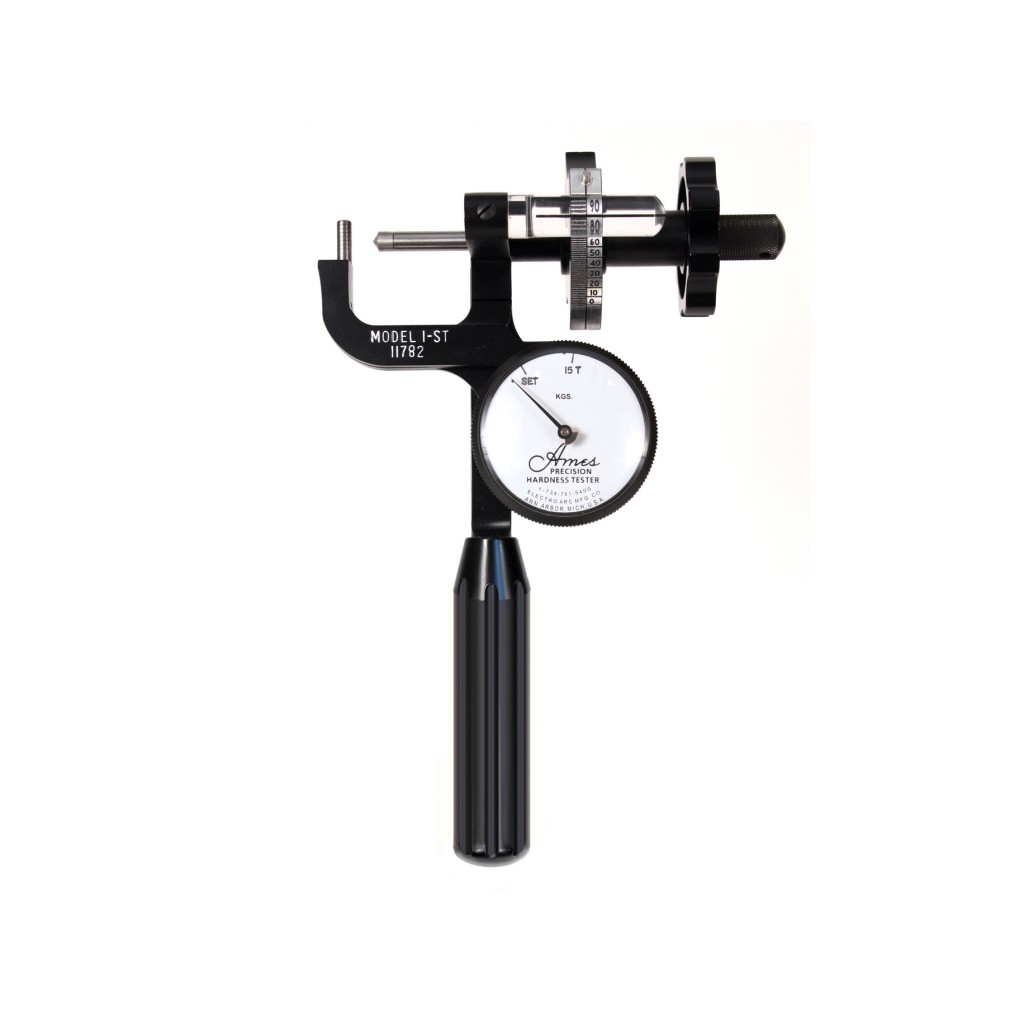
Use the Rockwell “N” scale to test Hardened steels, case hardened steels, and hardened strip steels down to about.006″ thick, and when you need to keep the mark left behind by the tester to a minimum.  Use the Rockwell “T” scale to test soft steels, copper, and aluminum alloys.  You can use an additional ball penetrator to test in Rockwell “W”  for some hard thin material down to .006″ thick and cemented carbides.  Rockwell “X”  and “Y” scales are used for testing plastics.  The model 1-ST is designed to test small-diameter and thin-walled tubes.  Using Rockwell “15-T” to test tube materials like aluminum, thin steel, lead, iron, titanium, copper alloys, and cemented carbides.

Industries such as aerodynamics, steel plants, stamping manufacturers, electronics, appliances, and air conditioning part manufacturers use these superficial testers because their components are super soft and thin.

Superficial and standard hardness testers operate in the exact same way.    The major difference is the material tested and the  Rockwell scale you are testing in. You can purchase an Ames superficial tester in most of the same sizes as standard testers, with the exception of the model 8 and 16 testers, there is a like tester in the 4 main sizes of superficial testers:

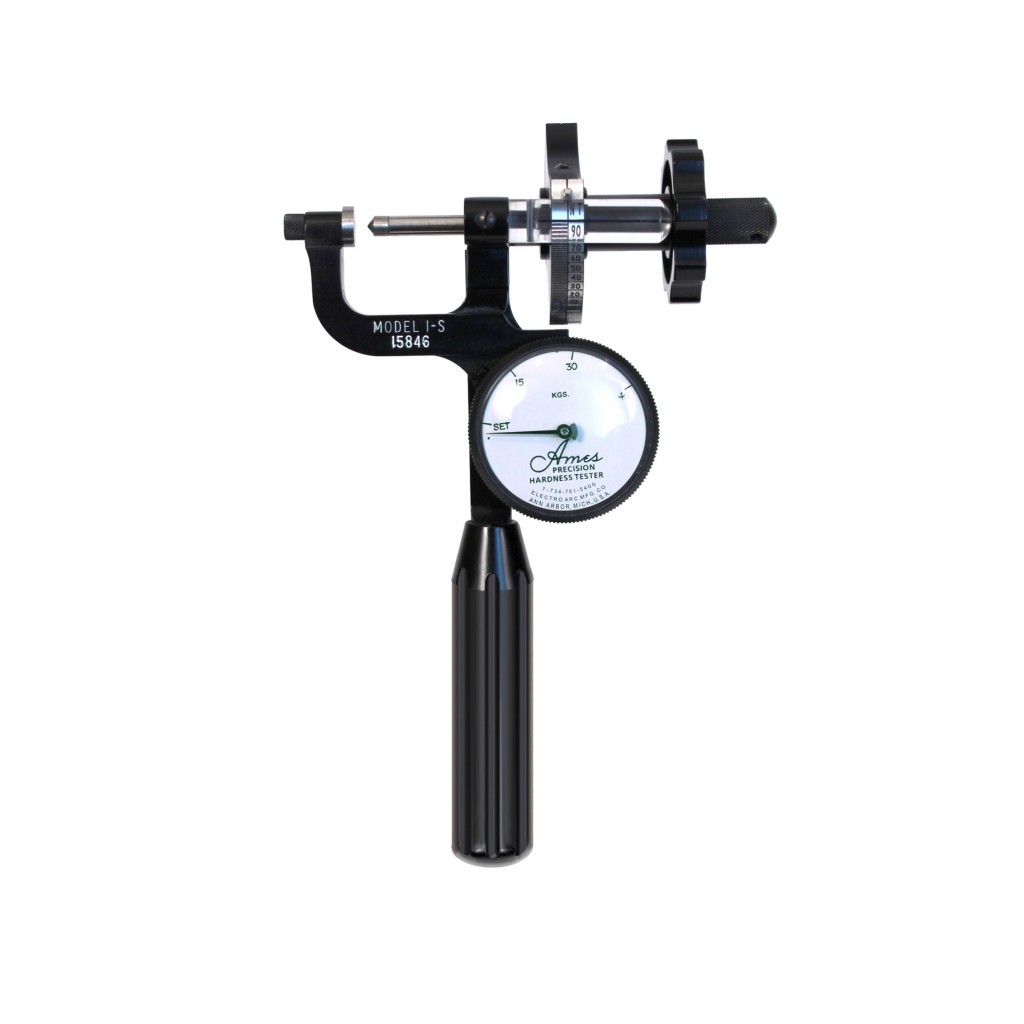
Model 1-S and model 1 Ames testers are the same size.  They have an opening  1 inch wide and a depth of 1 inch, so they are ideal for testing smaller parts.

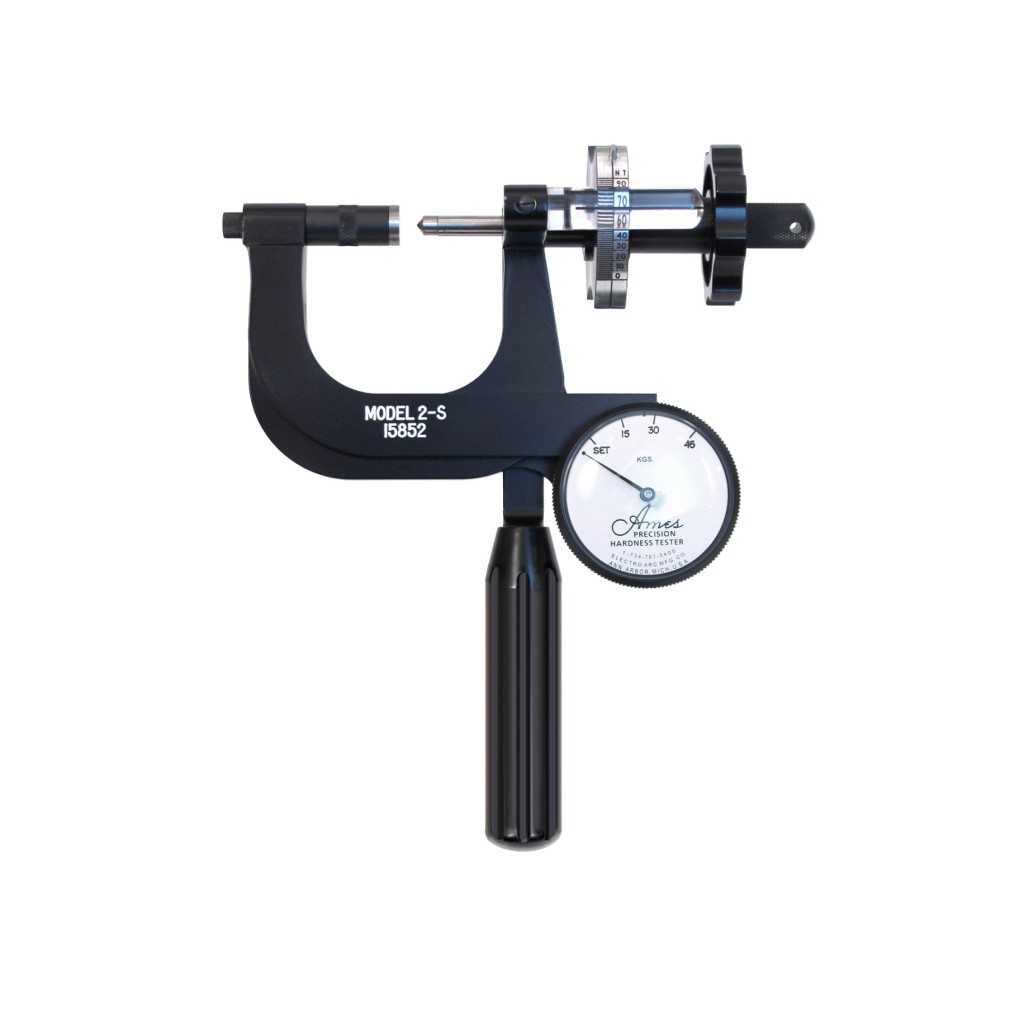
The model 2 and 2-s are the same size and have an opening of 2 inches with a depth of 2.115 inches. 

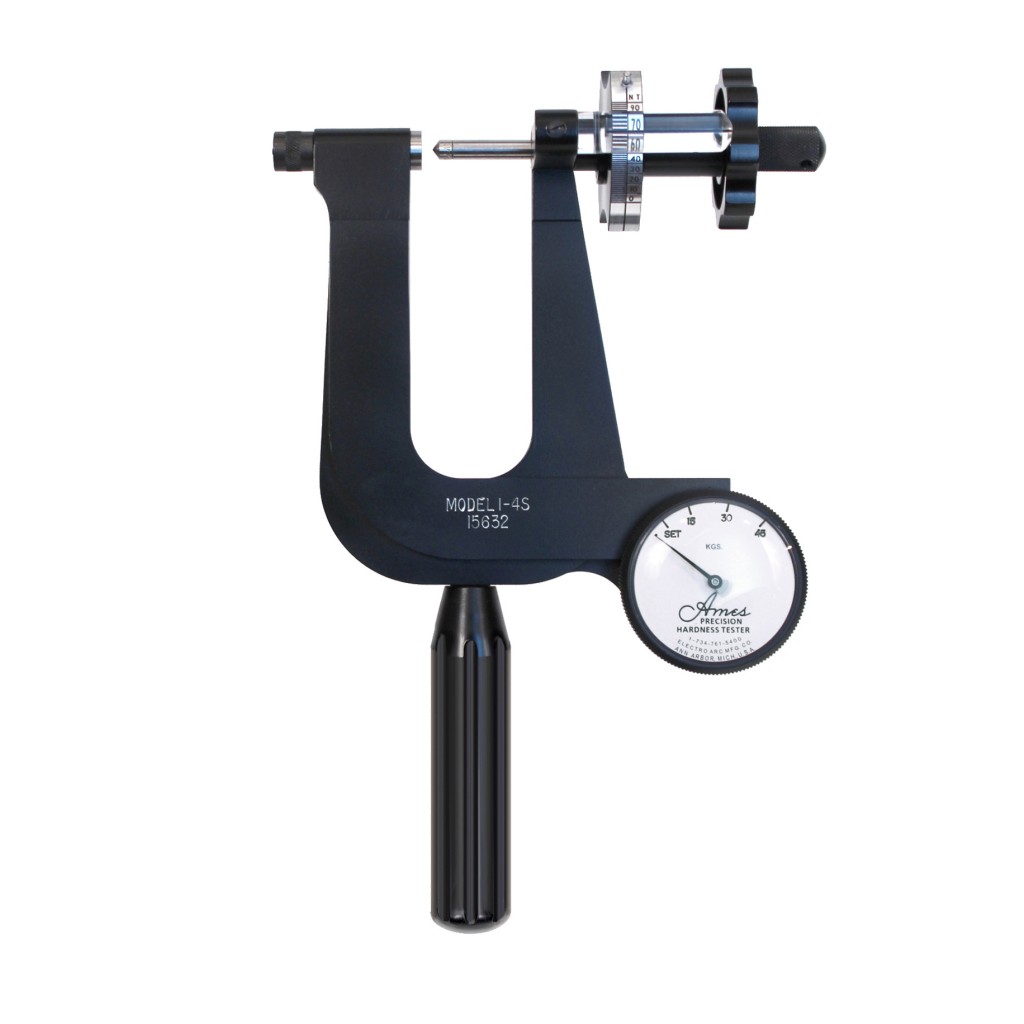
The model 1-4S and model 1-4 are the same sizes featuring an opening of 1 inch and a depth of 4 inches, great for longer, thin materials.

The model 4-4S and model 4-4 testers are the same size 4 inches wide and deep to allow you to test larger materials

The only tester with no standard equivalent is the model 1-ST, a special tube hardness tester.

The Importance of Hardness Testing in Machine Shops, Freight Yards, Warehouses, Factories and Laboratories

Hardness testing of metals before and after heat-treating is a common practice in manufacturing establishments like yours. Tests are made of materials before machining begins; of tools that are used and to check hardness after heat-treating.

Sheets of metals are tested to make certain they are not too hard to cause breakage of valuable dies. Bars are tested to insure proper machining speeds and protection of turning tools. Heat-treated parts are checked to control hardness within established limits for better performance and longer wear.

Ames Portable Hardness Testers are ideal for these purposes since they can be taken to the material receiving departments, to machines where you are working, and to every place by inspectors during the entire manufacturing process. Being portable, they check the hardness of parts while in machines being fabricated, and also after being assembled into complete sets.

Ames testers are used to check parts being machined that work harden under certain conditions. You test the hardness of large shear blades and cutters in machines, to check if heat developed in the operation of machines has affected the hardened shafts and parts. A book could be written on the many applications that Ames testers have found.

Customers all over the world learned to expect the best in design workmanship and accuracy in Ames hardness testers. With great pride, Ames offers portable hardness testers to all who make tests in Rockwell hardness scales. They are precisely made, carefully tested for accuracy, and beautifully finished. Enthusiastic owners, like you, have told others about Ames portable hardness testers and the savings made on a variety of interesting applications.

Until Ames Portable Hardness Testers were made in the year 1947, it was thought that only large bench-type hardness testers with weights and levers would give accurate results. Many attempts at building portable hardness testers were made by others that were failures, and the large bench machines seemed like the only accurate dependable type.

Ames employed the principle of the ordinary micrometer a C frame with a screw to perfect a lightweight, accurate easy-to-use hardness tester. Incorporating a sensitive dial indicator and graduated barrel dial, readings are taken directly in the Rockwell scales with no calculating or transposing. No skill is required by the operator, and the tests are made quickly and easily.

Ames portable hardness testers are used everywhere in a plant saving your company installation expenses, cost of transporting materials, and valuable stock that would be cut from bars and or sheets for test purposes with bench testers. Ames portable testers save you the cost of large stationary testers that would otherwise be needed in a plant. The cost of Ames testers is only a fraction of the bench-type testers.

The principle of Rockwell Hardness Testing is based on the scientifically established theory that a definite relationship exists between the hardness of a material and the depth of the penetration when the indentation method of measurement is used. The numbers of the Rockwell scales represent the depth of penetration when standard indenters are used under known pressure loads.

Frequently Used Rockwell Scales

This method has proved practical and accurate and is the simplest and quickest method yet devised for measuring hardness, hence the universal acceptance of Rockwell scales as a standard for measuring hardness. For testing hardened steels and alloys by the Rockwell method, a standard “C” penetrator is used under a pressure load of 150 kgs. The penetrator has a 120-degree cone carefully ground and polished and a diamond point that has been mechanically lapped to a spherical point with a .008-inch radius. For testing soft steels, nonferrous alloys, and cast iron, a standard 1/16″ diameter specially hardened steel ball penetrator, known as the “B” penetrator, is used and a pressure load of 100 kgs is applied. Readings in other Rockwell scales are obtained by using the diamond penetrator and ball penetrators of 1/8″ and 1/2″ diameter and 60 and 100 kg loads.

In the Rockwell method of Hardness testing, two loads, a minor, or initial load and a major load are applied. The depth of penetration actually measured is the additional depth resulting from the major load after the initial or minor load has been applied. This causes no serious difficulty or computation as the tester is set back to zero following the initial load. The resultant reading is believed to be a truer and more accurate measurement of hardness, in as much as surface imperfections or variations in the piece would cause inaccurate readings. By measuring only the increment or additional depth caused by the major load, inaccurate readings due to surface variations are eliminated.

In the Rockwell B and C scales, the minor load is 10 kgs and the major load is 100 and 150 kgs respectively. In the Rockwell Superficial scales, the minor load is 3 kgs and the major load is 15, 30, and 45 kgs respectively. Ames hardness testers employ the same penetrators and pressure loads as specified in Rockwell hardness testing and consequently read directly in the Rockwell scales. A chart of Rockwell scales is provided with each tester giving the penetrators and pressure loads to be used. This chart also gives equivalent Brinell readings.

Using your Ames Rockwell – Brinell Conversion table

Please note the contact information in these charts is not up to date

Ames Portable Hardness testers read in the Rockwell scale. The Rockwell scale uses indentation and measures the depth of that indentation with a major and minor load to determine the hardness of a metal. The scale used depends of the metal being tested and the portable hardness tester used.

Ames developed a conversion chart for use in converting Rockwell scale readings into the Brinell scale. This allows you to easily determine the equal Brinnell reading. This conversion chart is broken down into categories to help you determine the converted value.

Hardened Steel and Hard Alloys, locate the type of penetrator you used and the scale you used in the top column for the scale. In this case you will only see C, A, D, 15N, 30N and 45N scales which can then be converted into the Brinell scale. Follow the appropriate line across to locate the corresponding reading in the middle column marked ‘Brinell’.

The next section is Soft Steel, non-ferrous metal, grey and malleable iron casting, this section covers the B, E, F, G, 15T, 30T and 45T scales. You will need to find the appropriate load in order to find the correct conversion. The bottom of this conversion chart includes corrections which cover any readings that were not included in the original chart.

The right-hand side of the chart gives you a guide to choosing the appropriate penetrator and hardness scale for your metal.

What Comes with a New Ames Portable Hardness Tester?

A Look at the Ames Portable Hardness Tester Kit

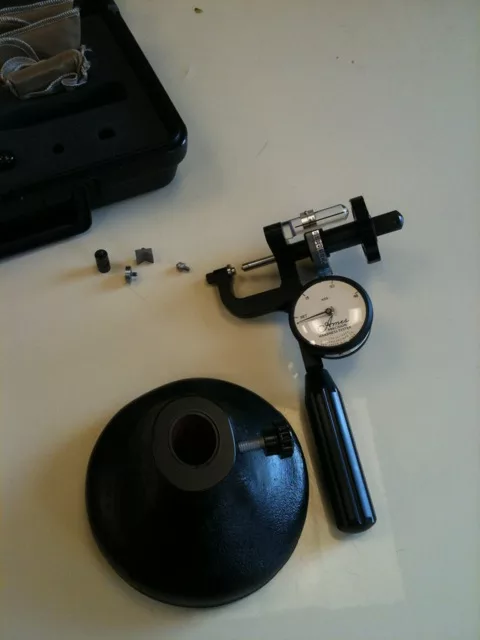
The Ames Portable Hardness Tester case is made from high impact plastic, lined with foam to keep your Ames Portable Hardness Tester safe in transit.  There is a space for your Ames Portable Hardness Tester, 3 test blocks, penetrators and anvils in this case.  You may also choose to purchase one of Ames limited edition Model 1 testers in the original wood box.  This is a new tester in the old style box which was discontinued.

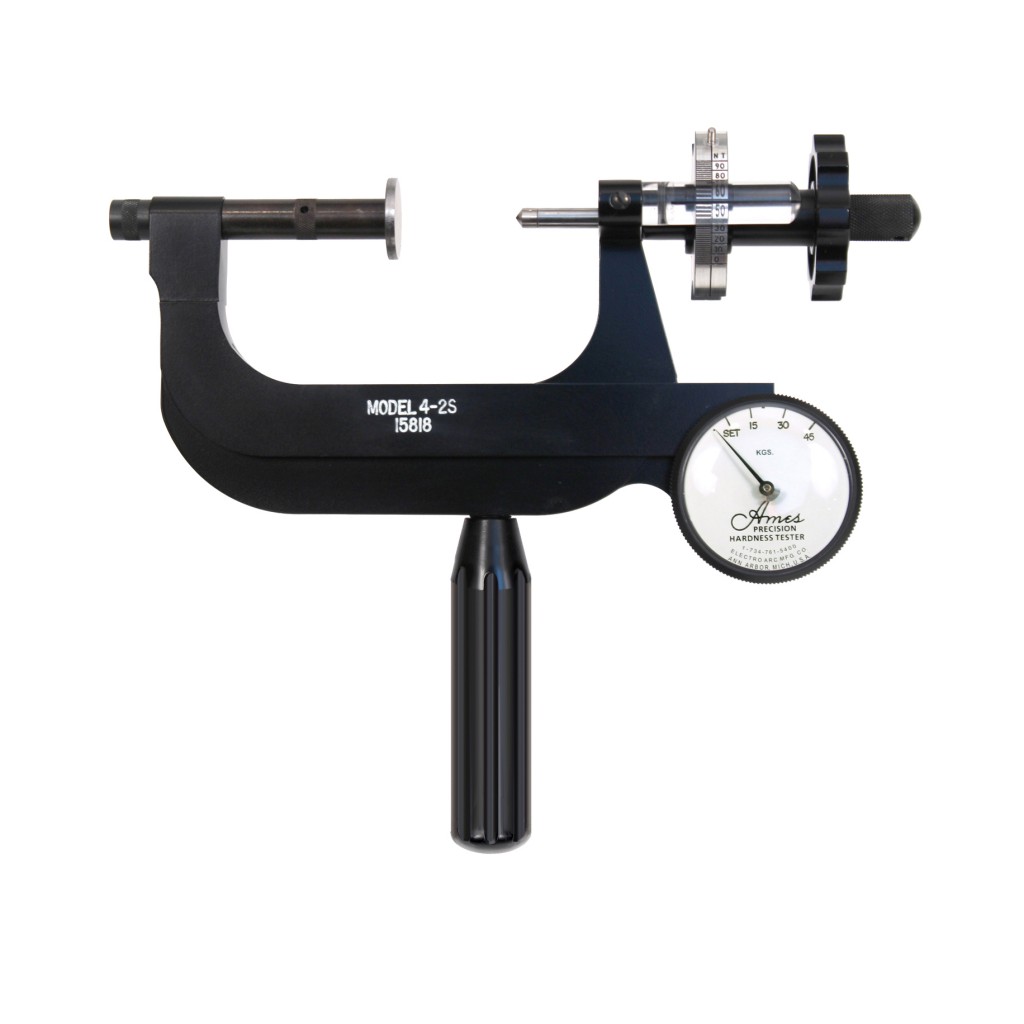
Of course your Ames kit will include the Ames Portable hardness Tester you have selected.  We manufacture Standard hardness testers which include the Model 1, Model 2, Model 1-4, Model 4-2, Model 4-4, Model 8 and Model 16 which test in Rockwell A, B, C, D and F scales, if you use them with our optional ball penetrators, they also test in Rockwell E, H, L, M, R, S and V scales as well. Our Superficial hardness testers include Model 1-S, Model 1-ST, Model 1-4S, and Model 4-2S which read in Rockwell scales N and T.  Using the additional ball penetrator they can also read in W, X and Y scales with the exception of the Model 1-ST which only reads in 15-T for tube testing. The only tester that does not include a carrying case is the model 16. 

Your kit will include a flat and a “V”anvil.  Anvils aid you in ensuring your tester provides valid readings.  The standard flat stock anvil is our most used anvil as it is designed for use with flat stock.  The “V” anvil is for small, round stock. Anvils are interchangeable.  We also sell raised flat anvils for thin stock, convex anvils for tube stock, round anvils for larger round stock.

You will receive one diamond penetrator and one ball penetrator in your Ames Portable Hardness Tester kit.  These penetrators are interchangeable.  You will need a different penetrator depending on the scale you are testing in.  Diamond penetrators are necessary for harder metals.  You can always purchase replacements on our website.

You will receive one hard steel, one soft steel and one brass test block with your Ames Portable Hardness Tester kit.  These testers help you with accuracy testing to ensure your tester is reading correctly.  Each Ames test block includes a certificate of calibration.  Superficial test blocks are standard with our superficial testers, and standard test blocks come with our standard hardness testers.  You may special order test blocks as well.

Ames hardness tester kits come standard with two extensions, one 1″ and one 1/2″ extension.  

Each Ames Portable Hardness tester includes a manual for use of your hardness tester.  If you lose your manual or need another copy, you can download it from our website at any time.  It is important to review this manual for proper care of your hardness tester, it also includes conversion charts for your use. 

Every Ames tester is factory calibrated before it is sold and every tester comes with a certification of calibration, our Ames test blocks include certification to the hardness on the test block.  Our testers meet NIST and ASTM E-110 standards.  You should return your tester to our factory for calibration once a year to ensure it continues to read accurately.  We also offer repair services.