The Importance of Hardness Testing in Machine Shops, Freight Yards, Warehouses, Factories and Laboratories
Hardness testing of metals before and after heat-treating is a common practice in manufacturing establishments like yours. Tests are made of materials before machining begins; of tools that are used and to check hardness after heat-treating.
Sheets of metals are tested to make certain they are not too hard to cause breakage of valuable dies. Bars are tested to insure proper machining speeds and protection of turning tools. Heat-treated parts are checked to control hardness within established limits for better performance and longer wear.
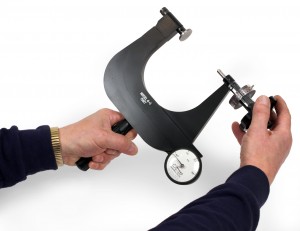
Ames Portable Hardness Testers are ideal for these purposes since they can be taken to the material receiving departments, to machines where you are working, and to every place by inspectors during the entire manufacturing process. Being portable, they check the hardness of parts while in machines being fabricated, and also after being assembled into complete sets.
Ames testers are used to check parts being machined that work harden under certain conditions. You test the hardness of large shear blades and cutters in machines, to check if heat developed in the operation of machines has affected the hardened shafts and parts. A book could be written on the many applications that Ames testers have found.
Customers all over the world learned to expect the best in design workmanship and accuracy in Ames hardness testers. With great pride, Ames offers portable hardness testers to all who make tests in Rockwell hardness scales. They are precisely made, carefully tested for accuracy, and beautifully finished. Enthusiastic owners, like you, have told others about Ames portable hardness testers and the savings made on a variety of interesting applications.
Until Ames Portable Hardness Testers were made in the year 1947, it was thought that only large bench-type hardness testers with weights and levers would give accurate results. Many attempts at building portable hardness testers were made by others that were failures, and the large bench machines seemed like the only accurate dependable type.
Ames employed the principle of the ordinary micrometer a C frame with a screw to perfect a lightweight, accurate easy-to-use hardness tester. Incorporating a sensitive dial indicator and graduated barrel dial, readings are taken directly in the Rockwell scales with no calculating or transposing. No skill is required by the operator, and the tests are made quickly and easily.
Ames portable hardness testers are used everywhere in a plant saving your company installation expenses, cost of transporting materials, and valuable stock that would be cut from bars and or sheets for test purposes with bench testers. Ames portable testers save you the cost of large stationary testers that would otherwise be needed in a plant. The cost of Ames testers is only a fraction of the bench-type testers.
The principle of Rockwell Hardness Testing is based on the scientifically established theory that a definite relationship exists between the hardness of a material and the depth of the penetration when the indentation method of measurement is used. The numbers of the Rockwell scales represent the depth of penetration when standard indenters are used under known pressure loads.
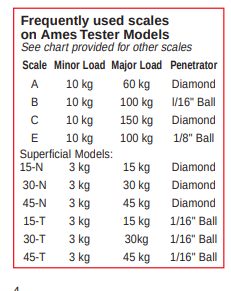
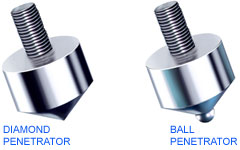
This method has proved practical and accurate and is the simplest and quickest method yet devised for measuring hardness, hence the universal acceptance of Rockwell scales as a standard for measuring hardness. For testing hardened steels and alloys by the Rockwell method, a standard “C” penetrator is used under a pressure load of 150 kgs. The penetrator has a 120-degree cone carefully ground and polished and a diamond point that has been mechanically lapped to a spherical point with a .008-inch radius. For testing soft steels, nonferrous alloys, and cast iron, a standard 1/16″ diameter specially hardened steel ball penetrator, known as the “B” penetrator, is used and a pressure load of 100 kgs is applied. Readings in other Rockwell scales are obtained by using the diamond penetrator and ball penetrators of 1/8″ and 1/2″ diameter and 60 and 100 kg loads.
In the Rockwell method of Hardness testing, two loads, a minor, or initial load and a major load are applied. The depth of penetration actually measured is the additional depth resulting from the major load after the initial or minor load has been applied. This causes no serious difficulty or computation as the tester is set back to zero following the initial load. The resultant reading is believed to be a truer and more accurate measurement of hardness, in as much as surface imperfections or variations in the piece would cause inaccurate readings. By measuring only the increment or additional depth caused by the major load, inaccurate readings due to surface variations are eliminated.
In the Rockwell B and C scales, the minor load is 10 kgs and the major load is 100 and 150 kgs respectively. In the Rockwell Superficial scales, the minor load is 3 kgs and the major load is 15, 30, and 45 kgs respectively. Ames hardness testers employ the same penetrators and pressure loads as specified in Rockwell hardness testing and consequently read directly in the Rockwell scales. A chart of Rockwell scales is provided with each tester giving the penetrators and pressure loads to be used. This chart also gives equivalent Brinell readings.
Using your Ames Rockwell – Brinell Conversion table
Ames Portable Hardness testers read in the Rockwell scale. The Rockwell scale uses indentation and measures the depth of that indentation with a major and minor load to determine the hardness of a metal. The scale used depends of the metal being tested and the portable hardness tester used.
Ames developed a conversion chart for use in converting Rockwell scale readings into the Brinell scale. This allows you to easily determine the equal Brinnell reading. This conversion chart is broken down into categories to help you determine the converted value.
Hardened Steel and Hard Alloys, locate the type of penetrator you used and the scale you used in the top column for the scale. In this case you will only see C, A, D, 15N, 30N and 45N scales which can then be converted into the Brinell scale. Follow the appropriate line across to locate the corresponding reading in the middle column marked ‘Brinell’.
The next section is Soft Steel, non-ferrous metal, grey and malleable iron casting, this section covers the B, E, F, G, 15T, 30T and 45T scales. You will need to find the appropriate load in order to find the correct conversion. The bottom of this conversion chart includes corrections which cover any readings that were not included in the original chart.
The right-hand side of the chart gives you a guide to choosing the appropriate penetrator and hardness scale for your metal.
What Comes with a New Ames Portable Hardness Tester?
A Look at the Ames Portable Hardness Tester Kit
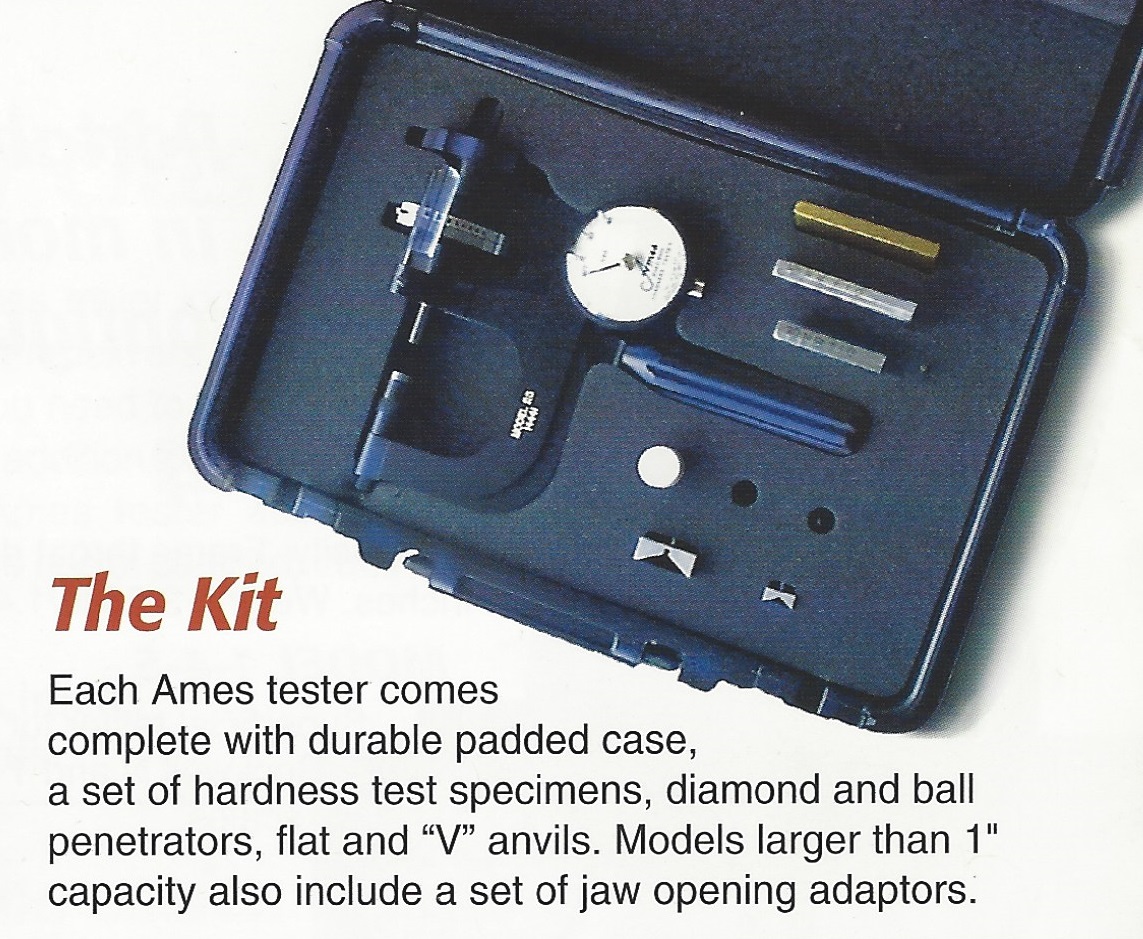
The Ames Portable Hardness Tester case is made from high impact plastic, lined with foam to keep your Ames Portable Hardness Tester safe in transit. There is a space for your Ames Portable Hardness Tester, 3 test blocks, penetrators and anvils in this case. You may also choose to purchase one of Ames limited edition Model 1 testers in the original wood box. This is a new tester in the old style box which was discontinued.
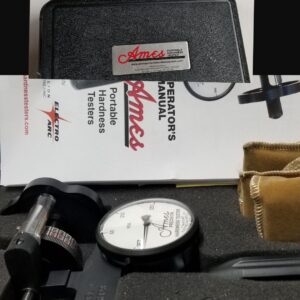
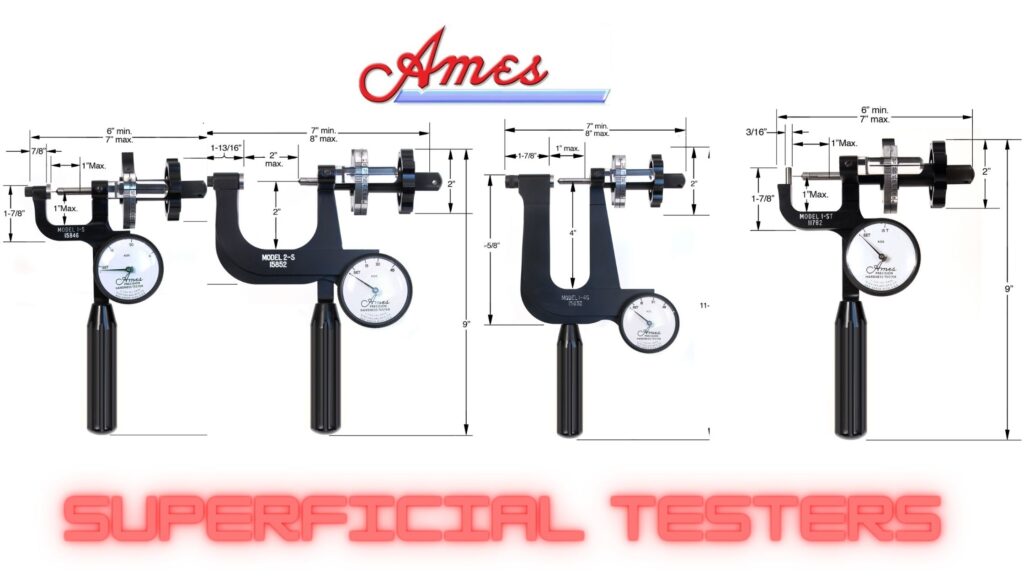
Of course your Ames kit will include the Ames Portable hardness Tester you have selected. We manufacture Standard hardness testers which include the Model 1, Model 2, Model 1-4, Model 4-2, Model 4-4, Model 8 and Model 16 which test in Rockwell A, B, C, D and F scales, if you use them with our optional ball penetrators, they also test in Rockwell E, H, L, M, R, S and V scales as well. Our Superficial hardness testers include Model 1-S, Model 1-ST, Model 1-4S, and Model 4-2S which read in Rockwell scales N and T. Using the additional ball penetrator they can also read in W, X and Y scales with the exception of the Model 1-ST which only reads in 15-T for tube testing. The only tester that does not include a carrying case is the model 16.
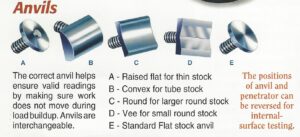
Your kit will include a flat and a “V”anvil. Anvils aid you in ensuring your tester provides valid readings. The standard flat stock anvil is our most used anvil as it is designed for use with flat stock. The “V” anvil is for small, round stock. Anvils are interchangeable. We also sell raised flat anvils for thin stock, convex anvils for tube stock, round anvils for larger round stock.
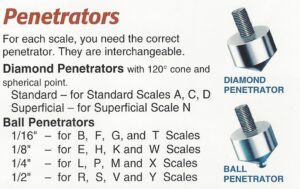
You will receive one diamond penetrator and one ball penetrator in your Ames Portable Hardness Tester kit. These penetrators are interchangeable. You will need a different penetrator depending on the scale you are testing in. Diamond penetrators are necessary for harder metals. You can always purchase replacements on our website.
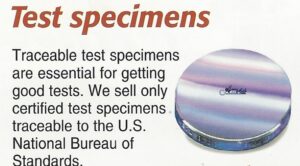
You will receive one hard steel, one soft steel and one brass test block with your Ames Portable Hardness Tester kit. These testers help you with accuracy testing to ensure your tester is reading correctly. Each Ames test block includes a certificate of calibration. Superficial test blocks are standard with our superficial testers, and standard test blocks come with our standard hardness testers. You may special order test blocks as well.
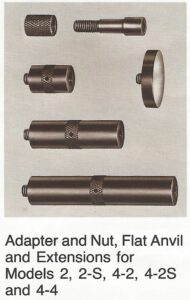
Ames hardness tester kits come standard with two extensions, one 1″ and one 1/2″ extension.
Each Ames Portable Hardness tester includes a manual for use of your hardness tester. If you lose your manual or need another copy, you can download it from our website at any time. It is important to review this manual for proper care of your hardness tester, it also includes conversion charts for your use.
Every Ames tester is factory calibrated before it is sold and every tester comes with a certification of calibration, our Ames test blocks include certification to the hardness on the test block. Our testers meet NIST and ASTM E-110 standards. You should return your tester to our factory for calibration once a year to ensure it continues to read accurately. We also offer repair services.
