What Ames Compliance Means for You

ASTM and ISO are standards designed to ensure traceability and repeatable accuracy. Our testers give accurate measurements in both large and small plants.
What is traceability? This term is indefinite as applied to relationships between calibrations and measuring activities of manufacturers and suppliers. Uncertainty concerning the validity of calibration data arises because of drift, environmental effects, transportation, and use. To provide support for the current validity of a calibration or to otherwise provide a basis for estimating accuracy, other procedures may be important or essential. Such as, the analysis of performance records of the instrument, local intercomparisons with other limits, checks the calibration at discrete points by the use of standard materials or devices, application of statistical methods in analysis of repeated measurements and in planning of measurements to determine or minimize the effects of disturbing variables, determination of measurement agreement between laboratories and the use of information related to the design and performance characteristics of the instrument.

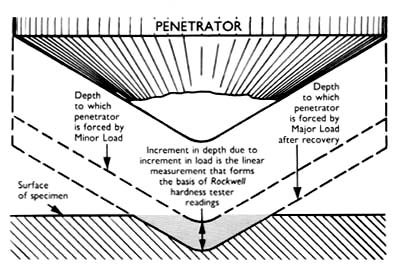
The Ames portable tester uses the penetration method of testing and is based on the Rockwell principle. A diamond penetrator is forced into hardened steel and hard alloys and a ball penetrator into soft steel, nonferrous metal and gray and malleable iron castings. Pressure to the penetrators is applied to screw action, caused by turning the large operating wheel. A supersensitive dial indicator has graduations on the dial that indicates when pressures of 10, 60, 100 and 150 KG have been applied.

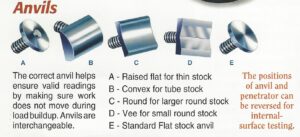
The portable hardness tester has a wide field of applications. Its use on a wide variety of hardness testing jobs is facilitated by the use of attachments. An extended V anvil is used to test small diameter round stock. The special spindle is used to keep the spindle from extending nearly full length from the tester frame and to prevent the penetrator from riding off-center. Larger round s are tested with a V anvil which is supplied as standard equipment with each tester. Small rounds are difficult if not impossible to test the accuracy of tests drops sharply on diameters under 3/16 in. Tables and charts have been worked out showing the degree of accuracy attainable in small diameters.

The hardness of full lenth sheets of steel, brass, aluminum, tin plate and the like are tested without the necessity of cutting off coupons or specimens. Because of that fact, warehouses are finding such testers useful for checking quantities of sheet stock. Some manufacturers use portable testers for checking the hardness of sheets before they go through pressure because one sheet of hard stock may breakdown valuable punches and dies.
Repeatable accuracy means repetitive tests on the same material will result in the same reading. This benefit is not generally available on competitive portable testers. No loss of accuracy is experienced when transferring readings into the Rockwell scale because all readings are made directly into the Rockwell scales. The accuracy of Ames testers may be favorably compared to the accuracy of large bench-type testers when testes are performed in the same environment.