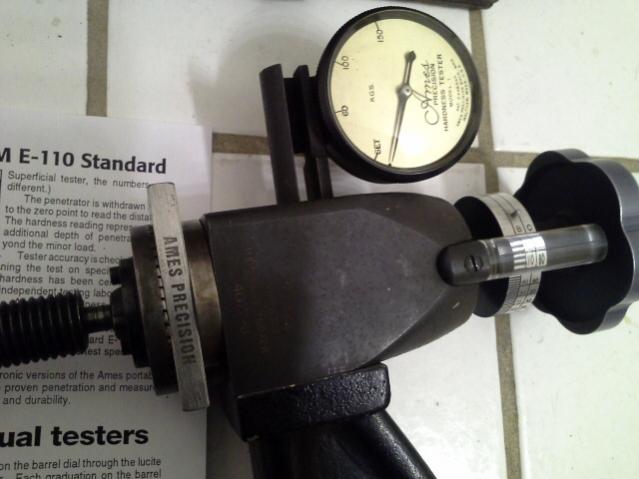
Tag: Ames portable hardness tester

Ames Upgraded their Wooden Instrument Case in 2000
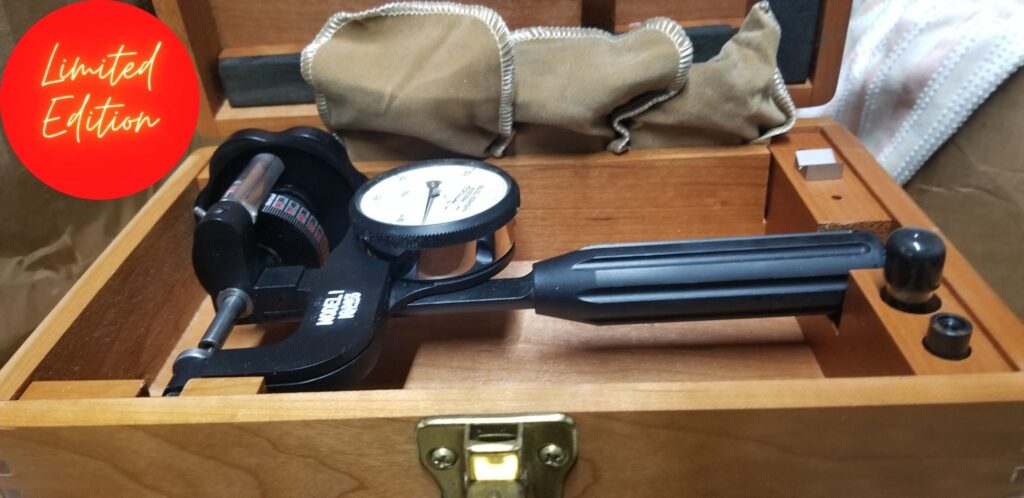
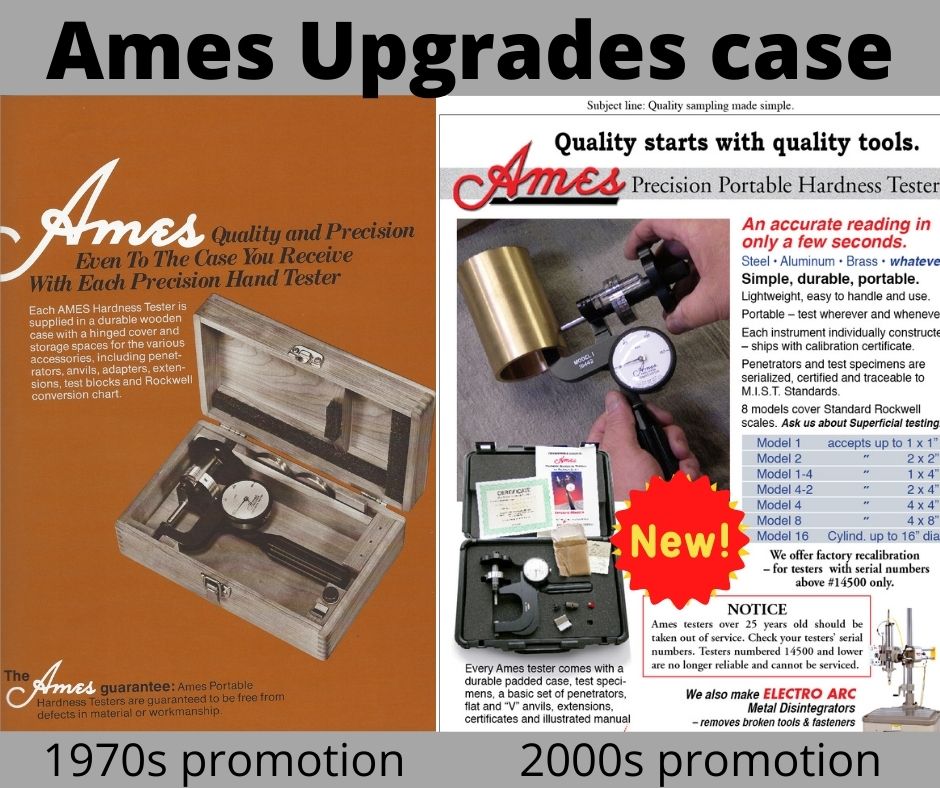
What you get when you purchase an Ames Hardness Tester has never changed, the case you get your tester in did. From the time Electro Arc purchased Ames Portable Hardness Testers in 1975, they were sold as a kit including the tester, a set of hardness test specimens, diamond and ball penetrators, and flat and “V” anvils. Models larger than 1″ also include a set of jaw-opening adapters.
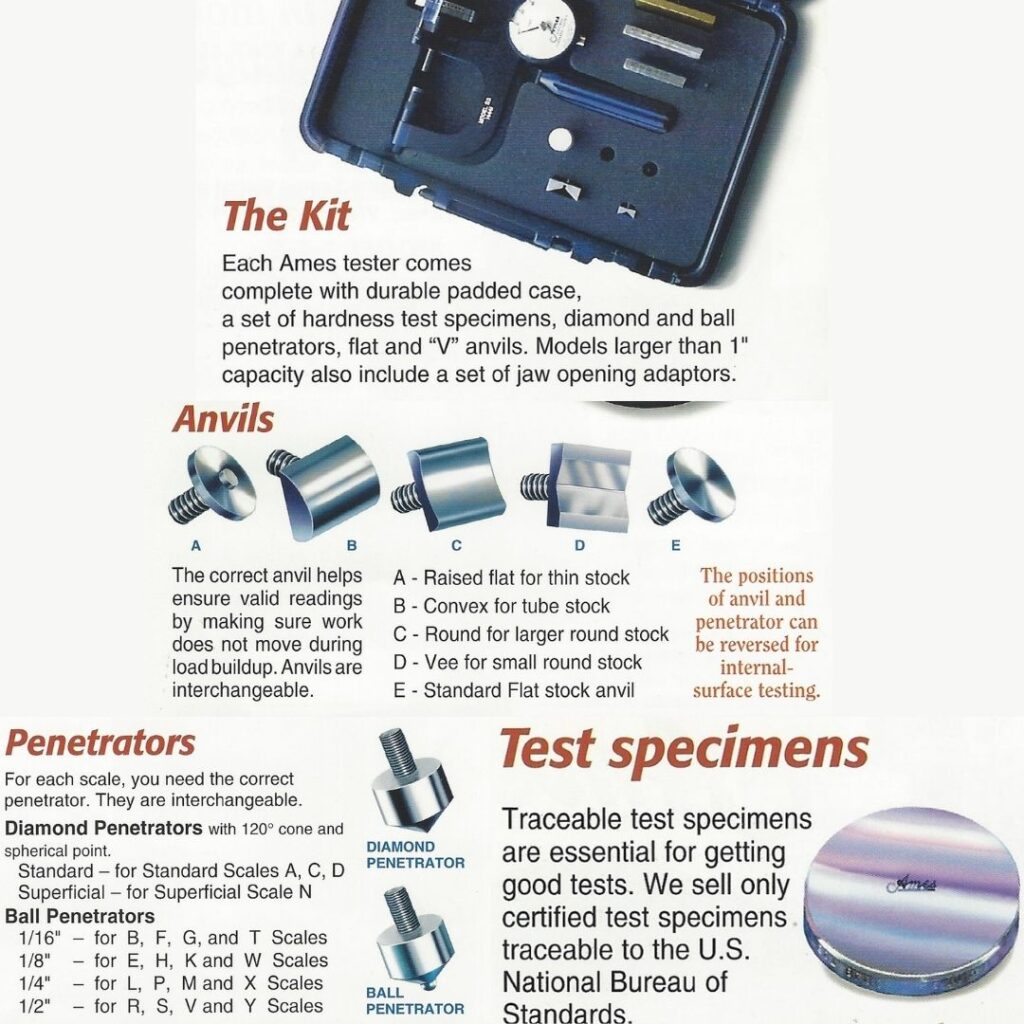
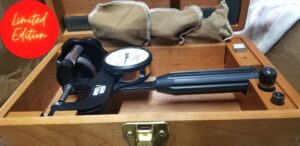
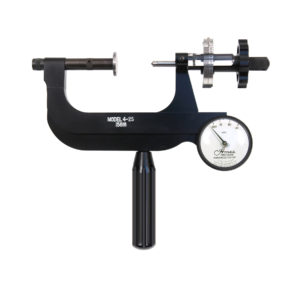
Ames portable hardness testers have a very traditional, fine-instrument look to them. They should: they have been around manufacturing and metal shops for fifty years, quietly doing their jobs. In their highly varnished, dovetail-joined wooden cases, some of them have probably been mistaken for antiques. Ames announced sleek new cases for its proven line of portable, easy-to-use hardness testers in May of 2000. The smart black bolded high impact cases, with full loam cradling provide better protection for these precision instruments than the wooden cases previously supplied.

Although they are precision instruments and should be handled as such, they are surprisingly durable. Some Ames testers are still working perfectly after thirty years of service, an age at which other machines really are antiques. Accuracy testing and annual calibration are required to keep these testers testing accurately. To help Ames owners get the most value from their investment, we offer both calibration and repair services for your Ames tester.
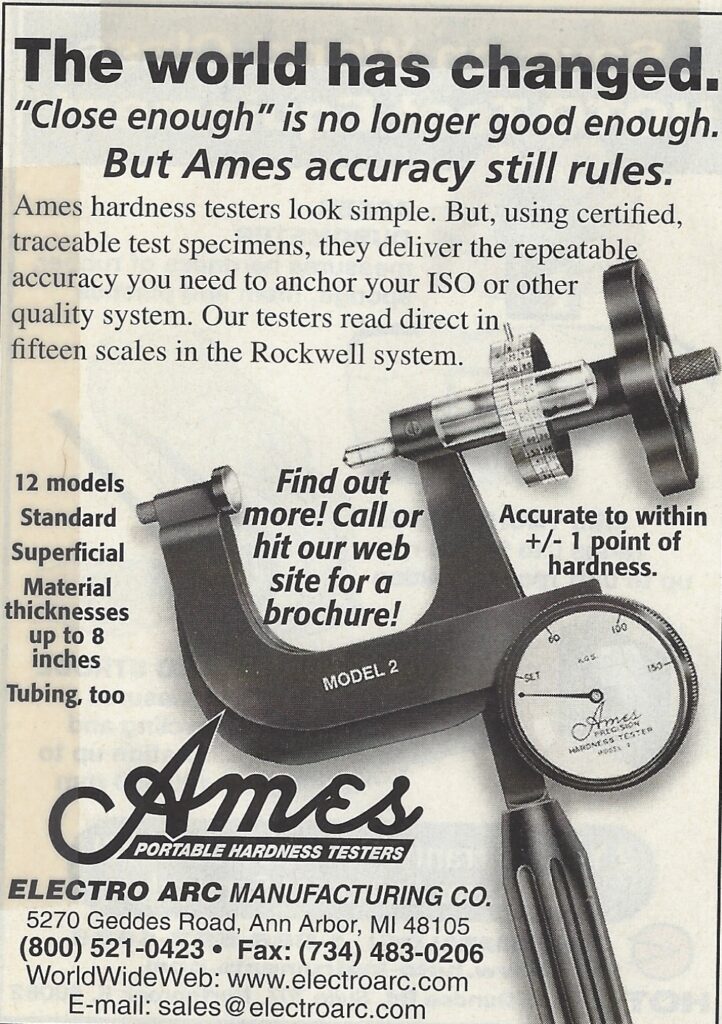
This kit contains everything you need to take your portable hardness tester with you in a secure and durable case. Ames portability lends itself to the appeal of using Ames portable hardness testers. Easy to use with one hand, easy to learn to use, and applicable in a number of work environments. Ames portable Rockwell testers have been manufactured continuously under the Ames name for over seventy years and for over fifty years under Electro Arc (now owned by Stillion Industries). They are guaranteed to comply with ASTM standard E-110 for testing hardness in Rockwell scales, with no conversion needed.
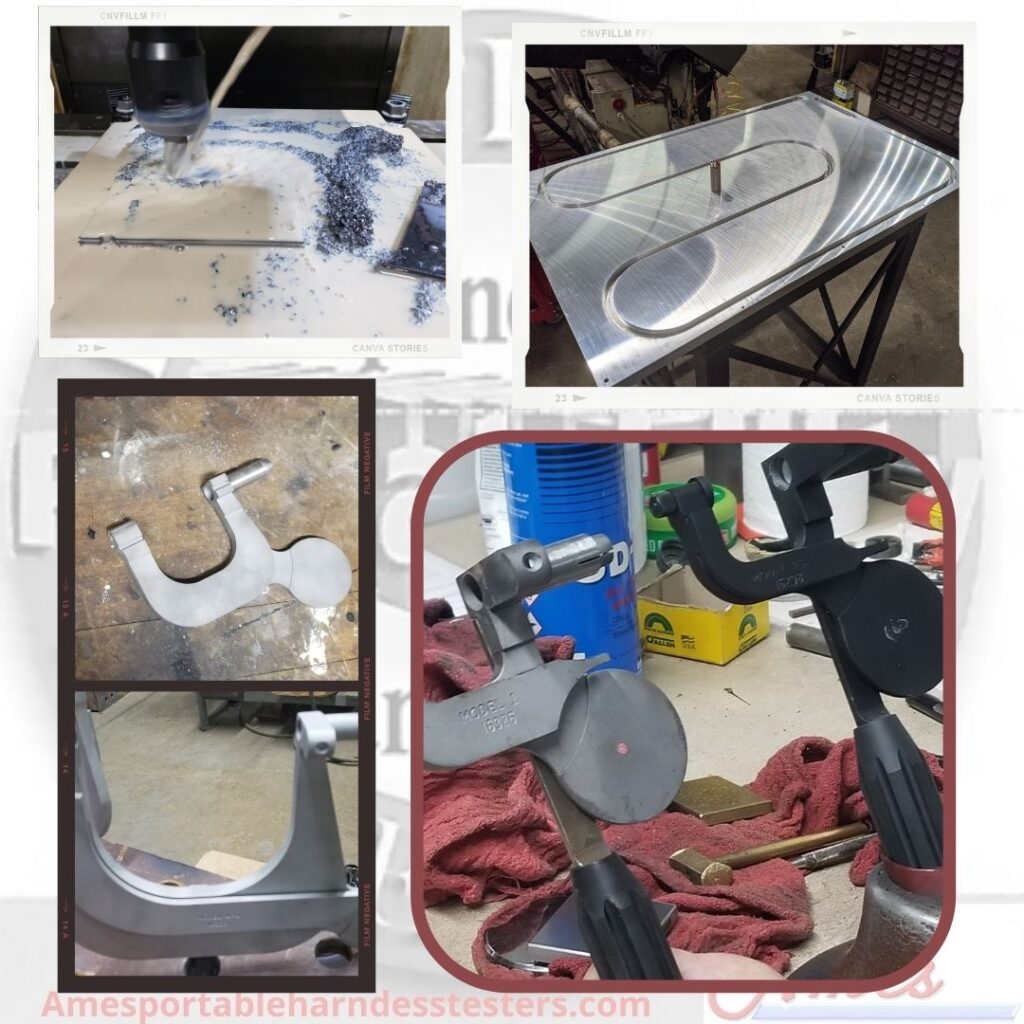
All Ames testers are 100% made in the USA, now 97% of the parts are machined by Stillion Industries. All Ames testers are assembled, tested, and calibrated onsite at our facility in Dexter, Michigan.
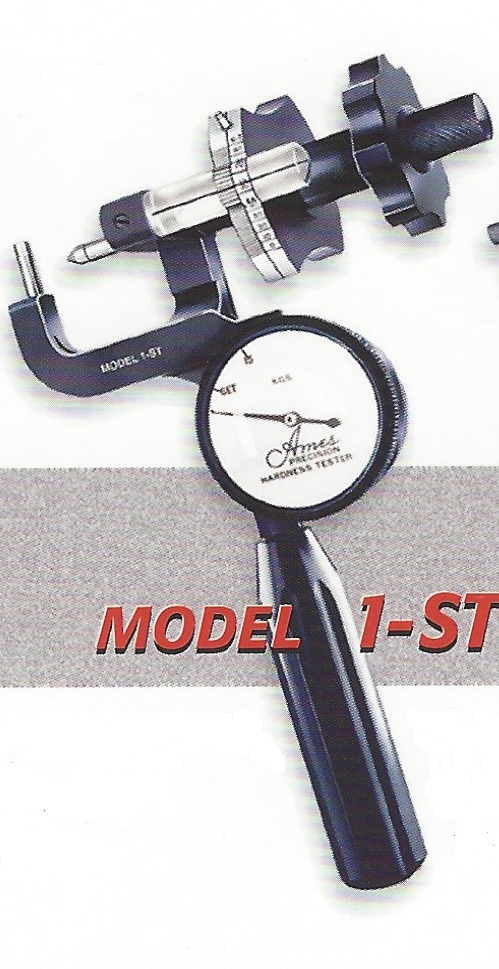
Ames Precision Model ST allows you to Check the Hardness of Tubing in Rockwell Scales

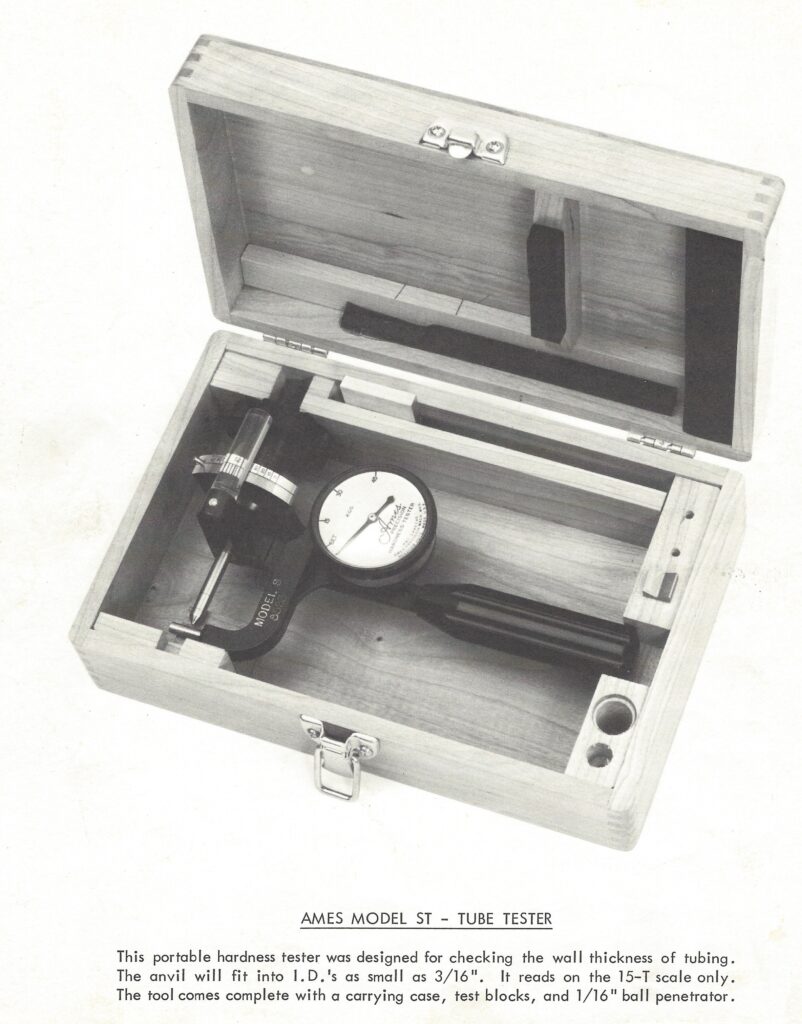
In May of 1977, Ames announced the release of the Ames Model ST portable Hardness Tester. This superficial tester is specifically designed for testing small diameter or thin wall tubing. The small anvil will fit into the inner wall of tubing as small as 3/16″ and is effective in checking larger sizes as well. The tube hardness tester reads in the 15-T scale and comes in a high-impact case just like our other portable hardness testers.

Original promotion for Ames Model ST – Tube Tester

The Ames model ST tubing tester uses a special cylindrical anvil to test soft tubular materials such as copper. This tester is recommended for small diameter tubing with thin walls. The maximum load for the model ST is 15 KG, anything greater will damage this tester.

Before you begin a hardness test using your model ST, be sure that the 1/16 ball penetrator is snuggly screwed into the end of the tester spindle shaft. The 1/18″ pin perpendicular to the spindle is the anvil.

How to use your Model ST Tube tester:

Step 1: Rotate the bezel (outer ring of the dial indicator) and position the face of the dial so that the dot on the face is directly below the indicator’s pointer hand.

Step 2: Position your part over the 1/8″ anvil and slowly rotate the handwheel until the penetrator makes contact with the part and moves the pointer hand on the dial indicator to the line marked set. Stop at this point. You have reached the minor load point (3 kg).

Step 3: Rotate the numbered aluminum barrel dial, so that the 1/16 inch pin rests on top of the lucite magnifier.

Step 4: Rotate the handwheel until the pointer hand on the dial indicator reaches the major load of 15 kg (do not over or undershoot the target). Immediately after reaching the major load, rotate the handwheel back to the “set” (minor load) position.

Step 5: To read the Rockwell hardness, find the fine line on the magnifier. The scale below the magnifier on the aluminum barrel is graded in units of 10. The short hash marks are in units of two.

Is my Ames or DoAll Portable Hardness Tester Eligible for Repair or Calibration?

The Electro Arc company obtained the Ames Portable Hardness Tester line in 1975 and began manufacturing the standard and superficial hardness testers and accessories. For a short period of time, the company also made Fowler Hardness Testers and in the mid 1980’s through the early 1990’s also made DoAll portable hardness testers. Ames is now a Stillion Industries product line, continuing to make and service all Ames Portable Hardness Testers and DoAll hardness testers with a serial number of 12000 or newer. Some DoAll Hardness testers were issued with serial numbers starting with 17 by mistake and these testers may not be eligible for repair or calibration.

Ames precision is based on the flex of the Ames Frame during hardness tests. Over time, the portable testers are no longer serviceable, they must be replaced. If you are considering buying a used Ames, DoAll or Fowler portable hardness tester, it is strongly recommended that you check the model number to determine if your tester is new enough to receive calibration or repair service.

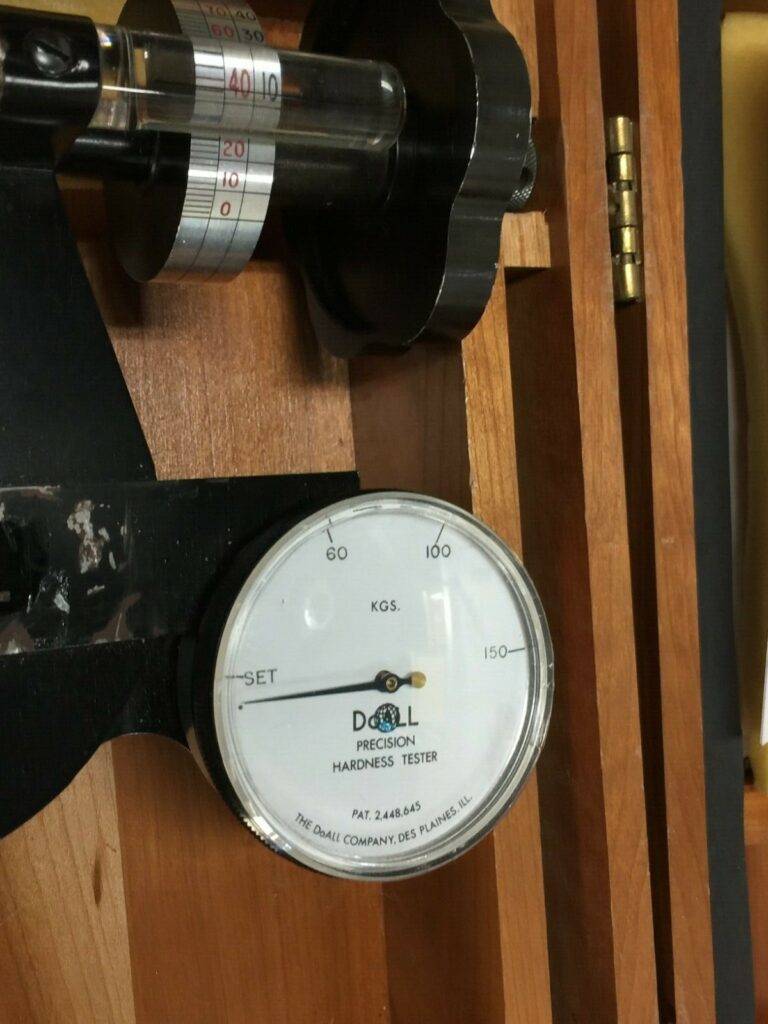
DoAll Portable Hardness Testers are identical to Ames portable Hardness testers with the exception of the dial indicator which bears the DoAll Precision logo.

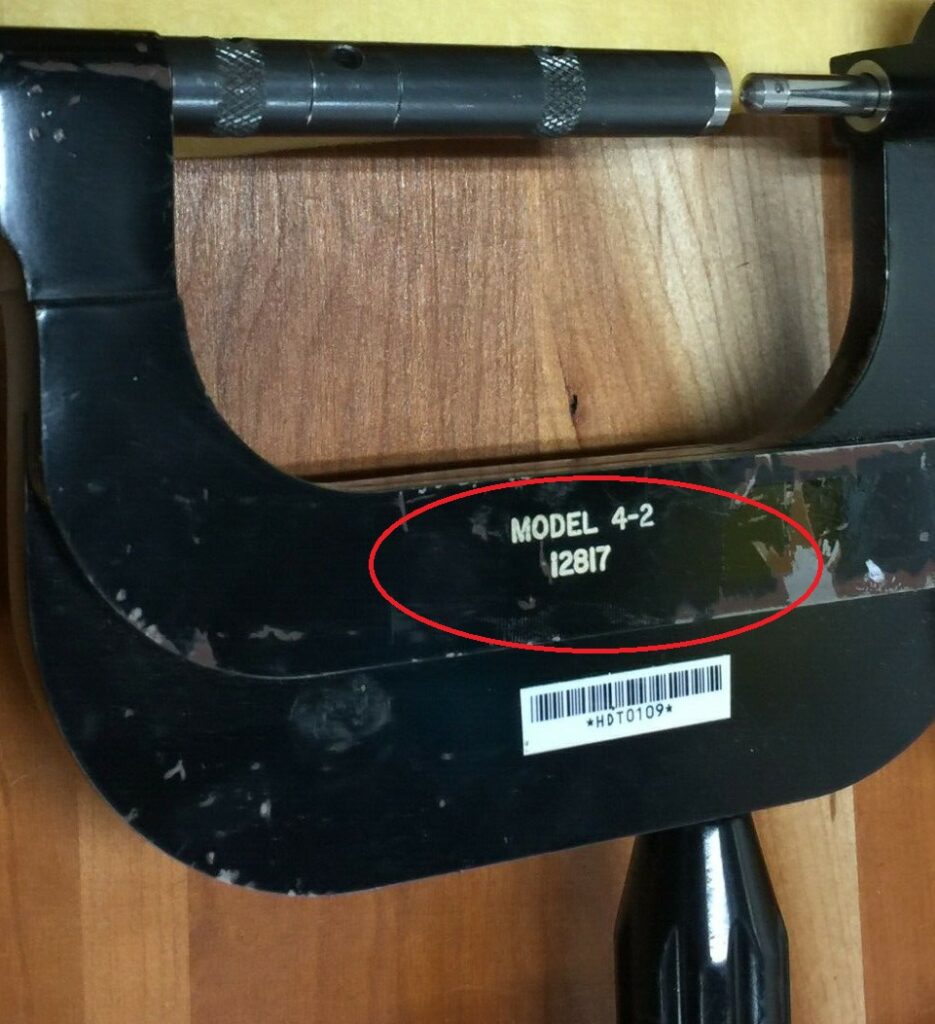
When determining if your Ames or DoAll precision tester can be calibrated or repaired, look at the model number engraved into the frame of the tester. If your portable tester does not have an engraved model number, chances are, it is not a genuine Ames Portable Hardness Tester. You can always call us with your model number because we have records of every portable hardness tester made and sold by Ames.

All portable hardness testers made and sold by Electro Arc, and now Stillion Industries feature the model number in the same place. DoAll and Fowler hardness testers also followed the same pattern. If you are planning to send your tester in for calibration or maintenance please be sure to include your company information with the tester when you send it.

Rockwell Hardness Charts for Metals

Ames Rockwell-Brinnell Conversion Chart

Our handy conversion chart helps you convert your Ames Hardness Readings from the Rockwell scales to Brinnell scales

Download Now

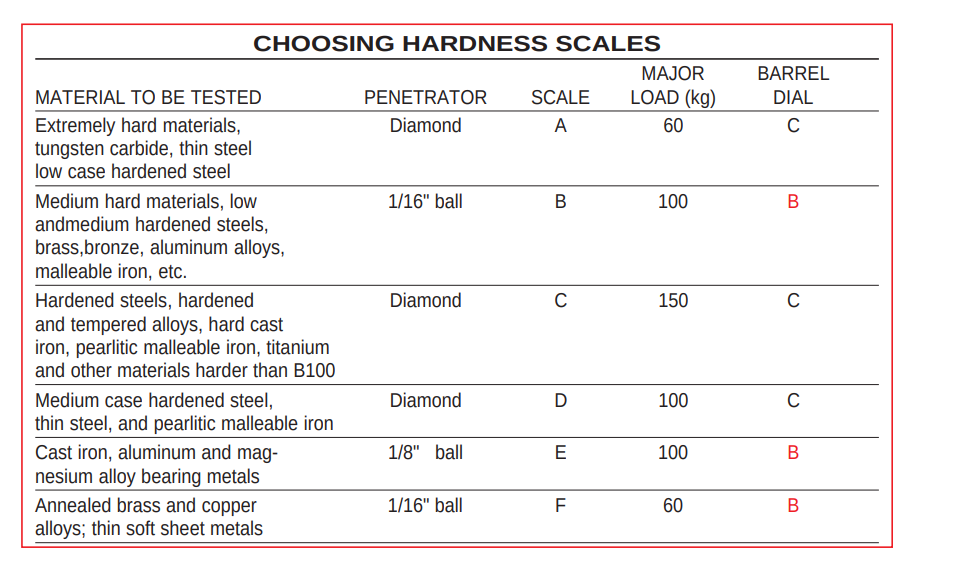
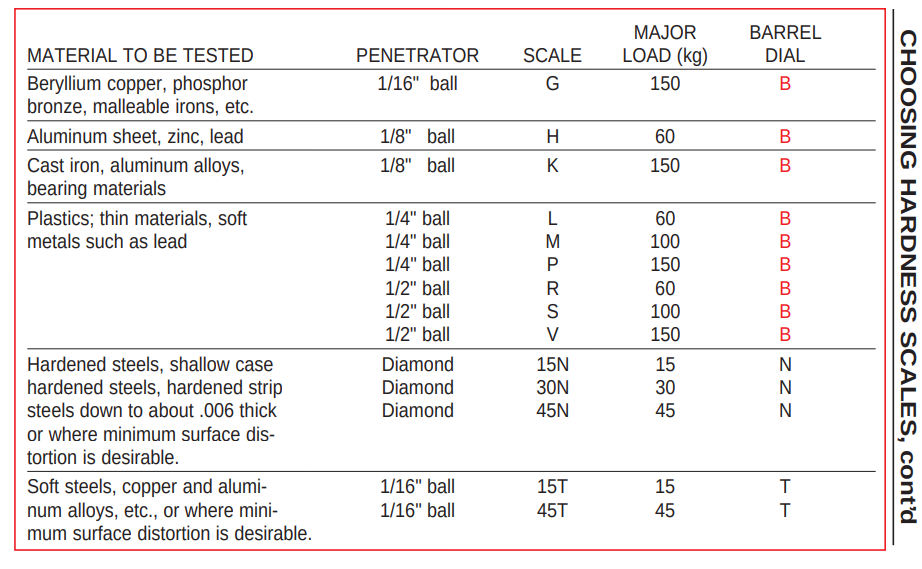
Choosing a Rockwell Hardness Scale

Below are a few Hardness Scale charts that will help you choose the proper set up for your Ames Rockwell portable hardness tester. The charts cover the following :

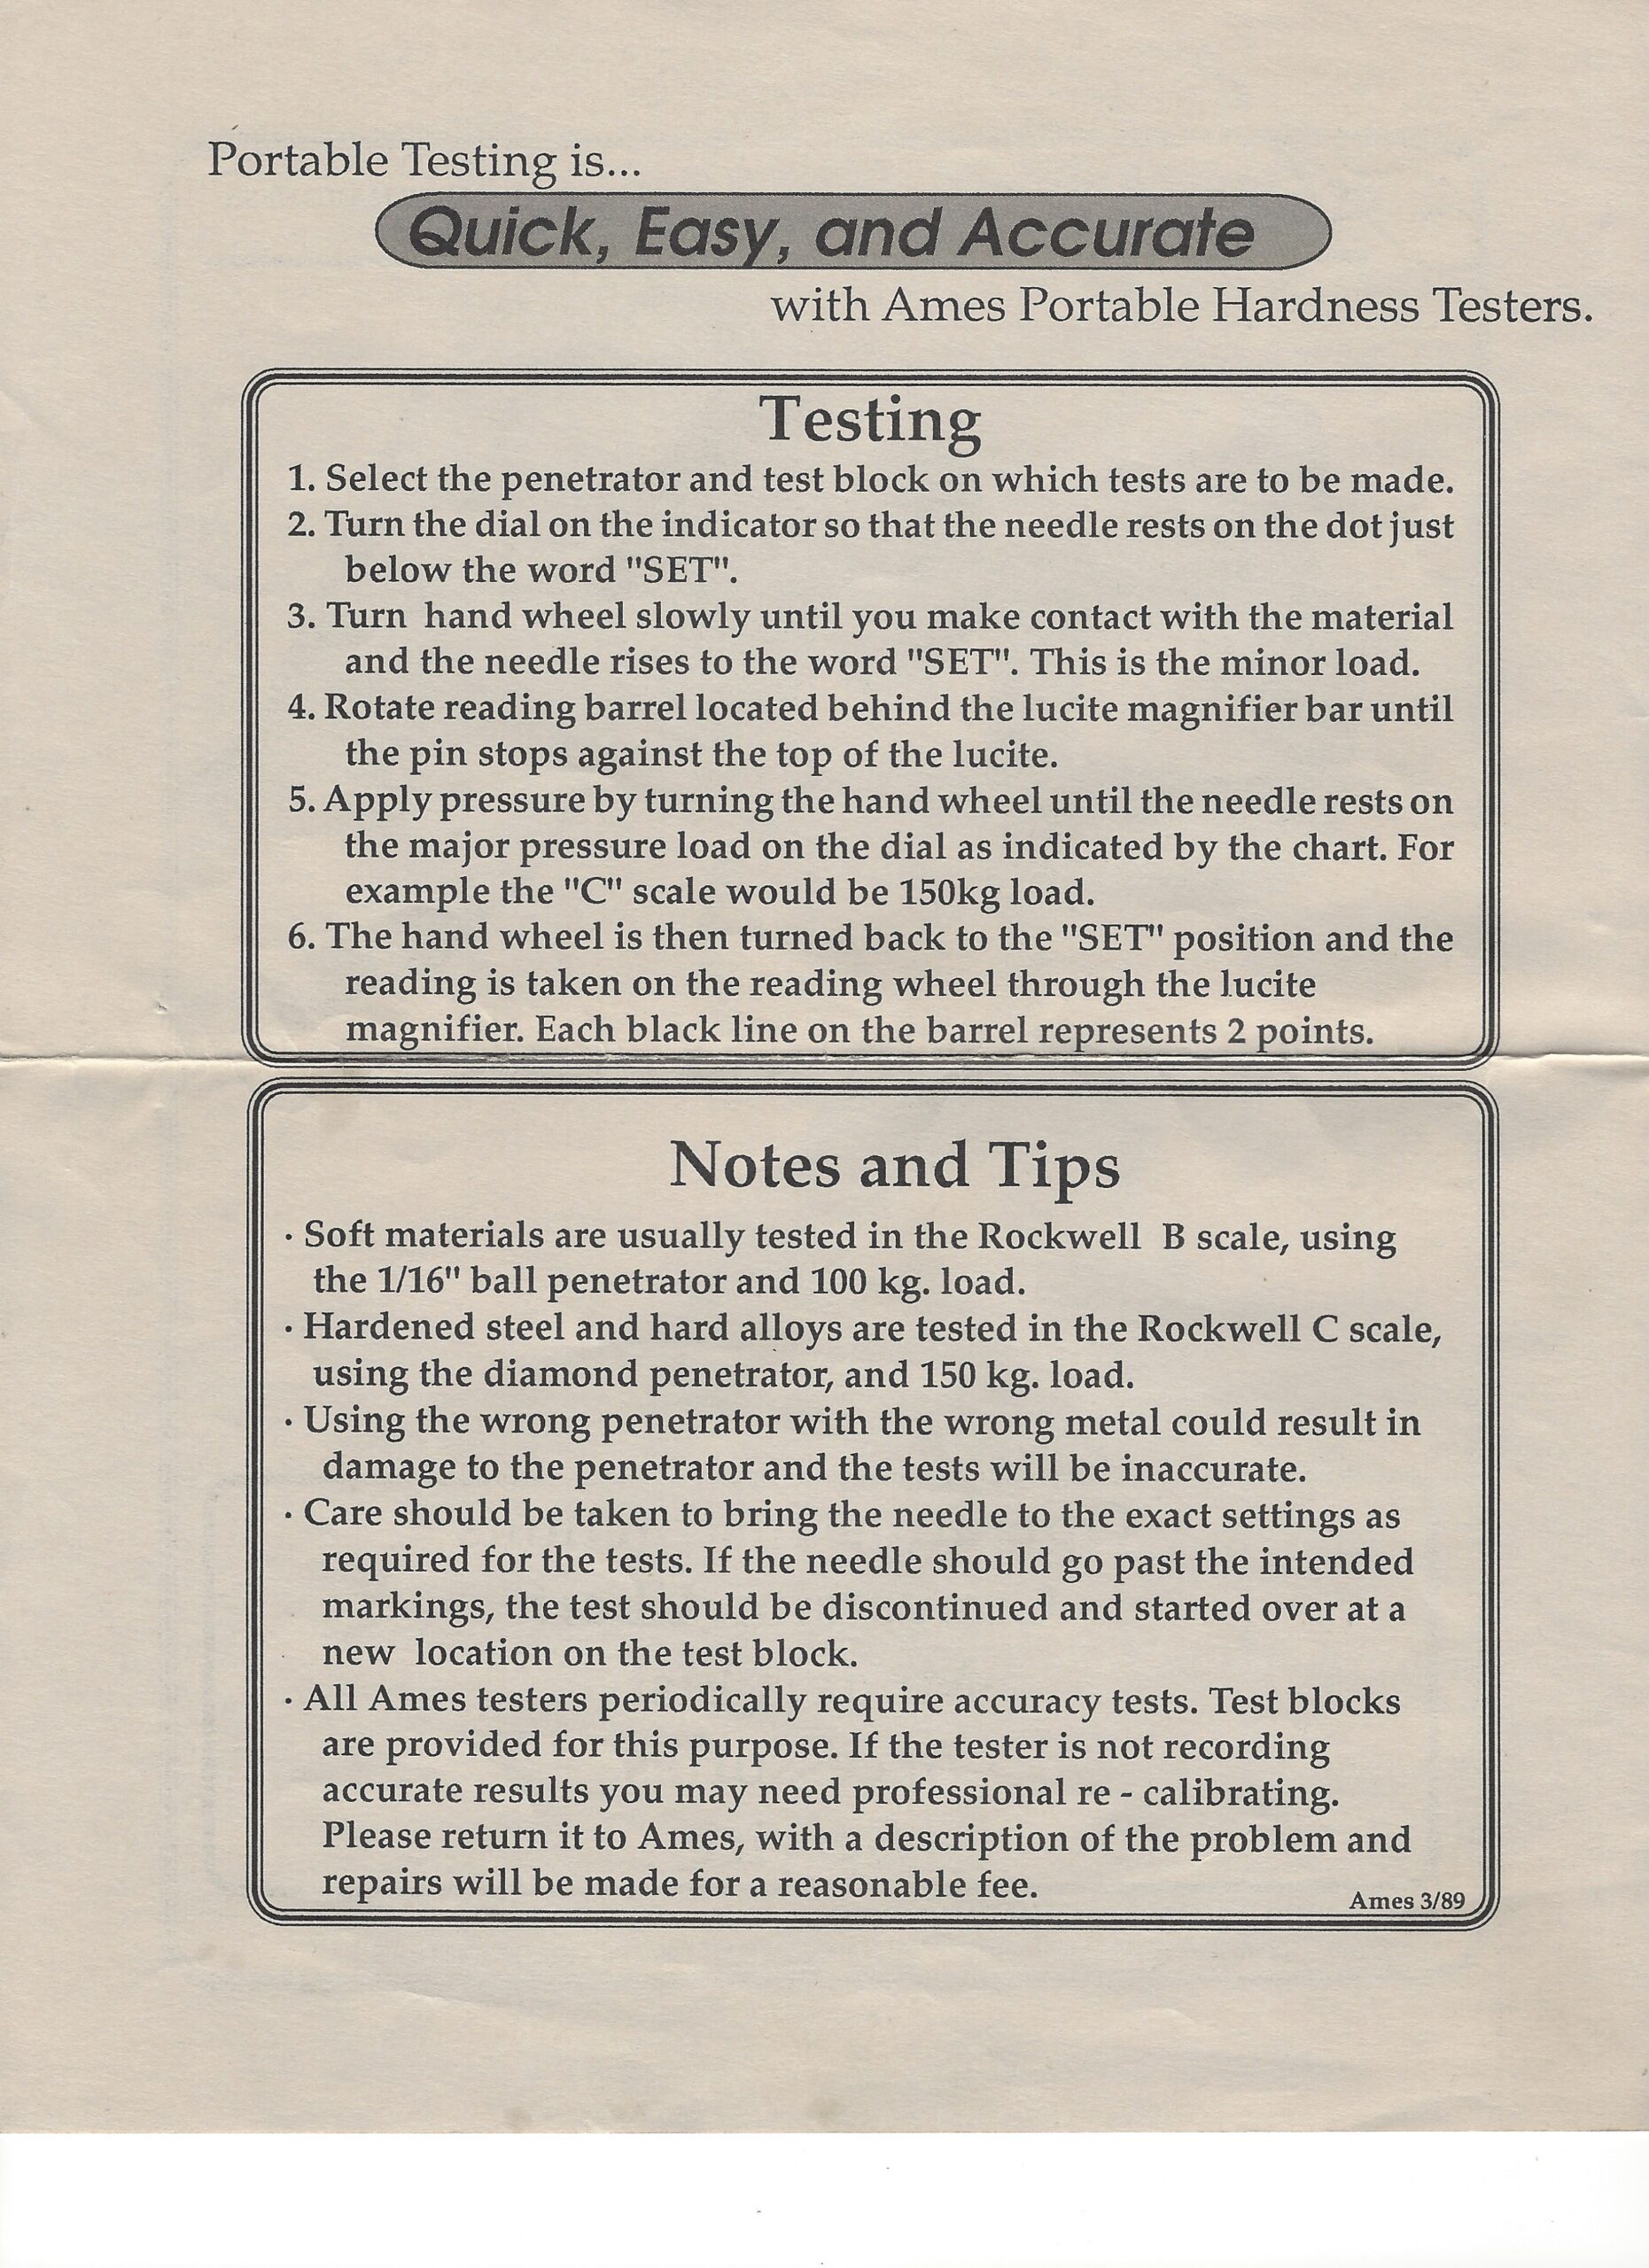
All information included in this article is found in the Ames Tester Manual. Download it here.

Material to be tested – 

Very hard metals, soft and hard steel, aluminum, brass, and thinner materials can all be tested with our testers.

Brass and aluminum alloys can be handled by using a 1/16 ball

The penetrator that is needed – 

Very hard metals like tungsten carbide, and thin steel needs to be tested using a Diamond penetrator.

Brass and aluminum alloys can be handled by using a 1/16 ball

Brass and aluminum alloys can be handled by using a 1/16 ball

The major load to be applied – 

Your tester is guaranteed to +/- 1 point Rockwell. When using this tester, you must use extreme care to position the pointer exactly on the minor and major load marks.

Lastly, the correct Barrel dial setting – 

The upper line of the barrel’s hardness scales should be exactly aligned beneath the hairline on the magnifier.

Do you need to convert Brinell to Rockwell?  See our Rockwell/Brinell conversion chart.


Metal hardness chart scale Rockwell Metal Hardness Charts

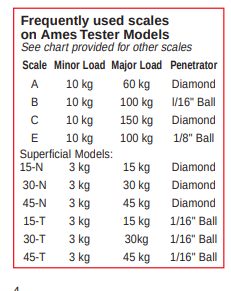
Here are some commonly used scales on our models.

Frequently Used Rockwell Scales

Please contact us with any questions regarding proper maintenance and set up of our Rockwell testers.

Shop Ames Hardness Testers:

Is your Ames Hardness tester genuine?

How to tell if your Tester is a Genuine Ames Hardness Tester

Ames began making Ames Portable Rockwell Hardness Testers in 1947.  In 1975 Ames was acquired by Electro Arc.  The Ames line of portable hardness testers has been made in Michigan since.

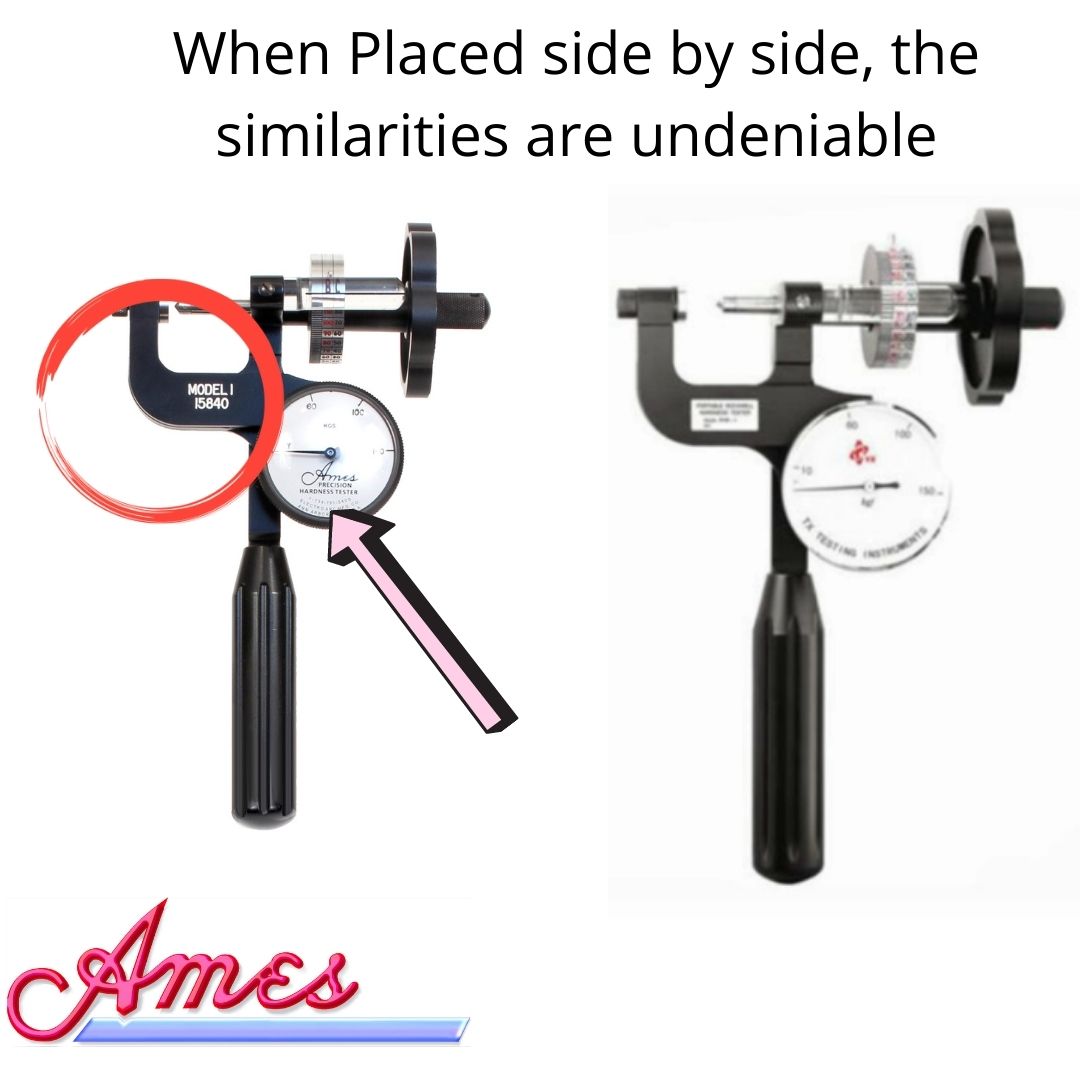
In 1997 it came to the attention of the Electro Arc company that each of it’s testers had been purchased by a company in China and duplicated.  Now Chinese copies of Ames Portable Hardness testers are available online, bearing a striking resembelance to the handcrafted testers we manufacture everyday.  Each of our testers are built one at a time following the ASTM E110 standard for the Rockwell scale.  Each genuine Ames Hardness tester is individually calibrated to the Rockwell scales and bears a signed certificate with each tester.

Is your Ames Hardness tester genuine?

How can you tell if your Ames Portable Hardness Tester is genuine?

  • It bears the Ames symbol within the dial indicator
  • You bought it directly from Amesportablehardnesstesters.com
  • Call us with the model number located on the front of your tester – we keep records of every tester we sell
  • Check the documentation included with your tester

How important is metal hardness testing? Consider the information provided by hardness testing and its significance in structural (i.e. bridges), aerospace, automotive, quality control, failure analysis and many other forms of manufacturing and industry. Determining material properties provides valuable insight to the durability, strength, flexibility and capabilities of a variety of component types from raw materials to finished goods.

Hardness testing is used extensively to characterize materials and to determine if they are suitable for their intended use. Why then would you buy a Chinese copy of a hardness tester?

  •  When quality is critical, should you trust a counterfeit hardness tester?
  •  Can it be calibrated?
  •  Will it hold up?
  •  Can it be serviced?
  •  Does it really meet the ASTM standard?

Ames Hardness Testers can be repaired and calibrated at our facility in Dexter Michigan.  We also service Dell models.  We do not offer service for any other brands.  When considering a purchase of a Rockwell Hardness Tester to insure quality, you should consider its quality, repeat-ability and reliability.

7 Things you Should and Should Not Do When Caring For Your Rockwell Tester

Your Ames portable hardness tester is a precious instrument.  As with any tool, proper care and maintenance is essential to maintain accurate testing results.  Remember, annual calibration is essential to properly maintaining your teseter.  Our metal hardness testers and accessories are machined, assembled and calibrated in our facility located in Dexter Michigan.

Ames Portable Hardness Testers are Made in Michigan

We have compiled the following list of do’s and don’ts to protect your hardness testing machine and keep it in the best working order.
7 Things You Should Do to Properly Care for your Ames Portable Tester:

  • Spray WD- 40 on a soft towel to clean your tester and test blocks
  • Make sure the Penetrator, extensions, and anvils are tightly secured
  • Store your test blocks in the plastic bag that is provided
  • Store your Rockwell tester in a safe location
  • Send your tester back for a yearly cleaning and re-calibration (if needed)
  • Only use the appropriate anvil for the application.
  • Perform regular tests on your Ames Tester to ensure accuracy
    Ames 4-4 portable hardness tester with manual

7 Things you Should Not Do to Your Ames Portable Tester:

  • Never apply oil directly on the tester
  • Do not drop or bang your tester
  • Never exceed major loads
  • Never use both sides of the test blocks. (one side only)
  • Do not retract the spindle past the threads of the penetrator
  • Never bang the tip of the diamond into the part or test block
  • Do not over or under shoot the minor or major loads

Your Ames Portable Hardness Tester is guaranteed to last for years if you follow these recommendations.  Be sure to follow the directions in the manual included with your tester.  Store your tester and testing blocks in the case provided when it is not in use.  As recommended by ASTM, perform regular accuracy checks to your tester to ensure the readings are accurate.

This blog was updated on December 14, 2021